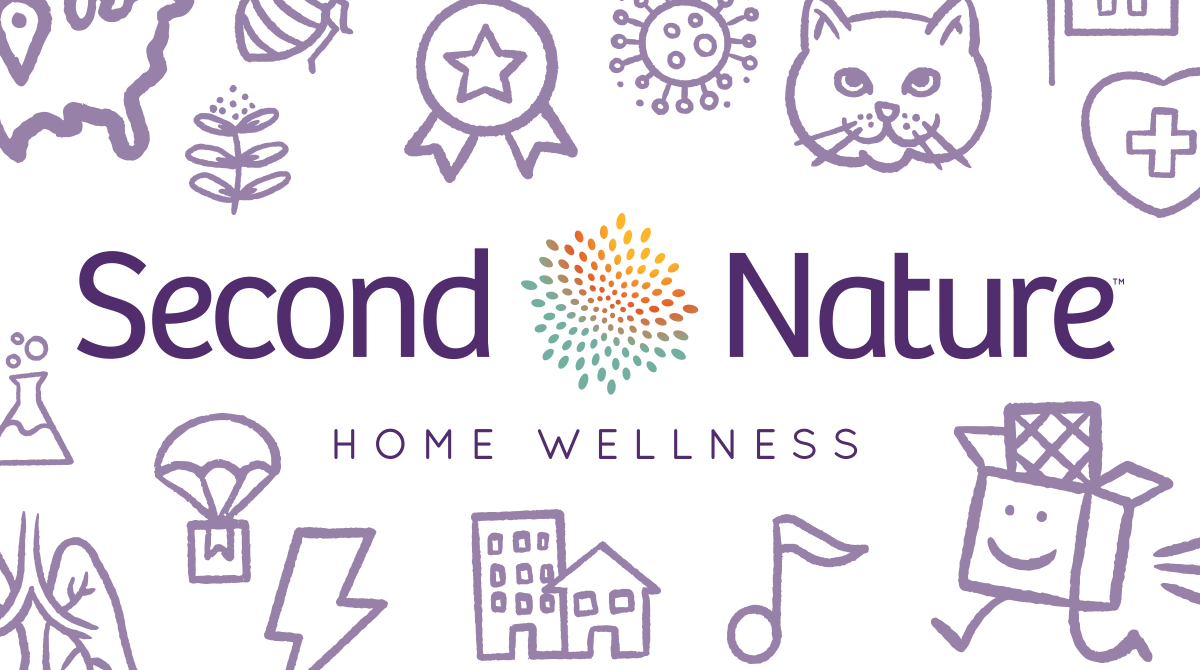
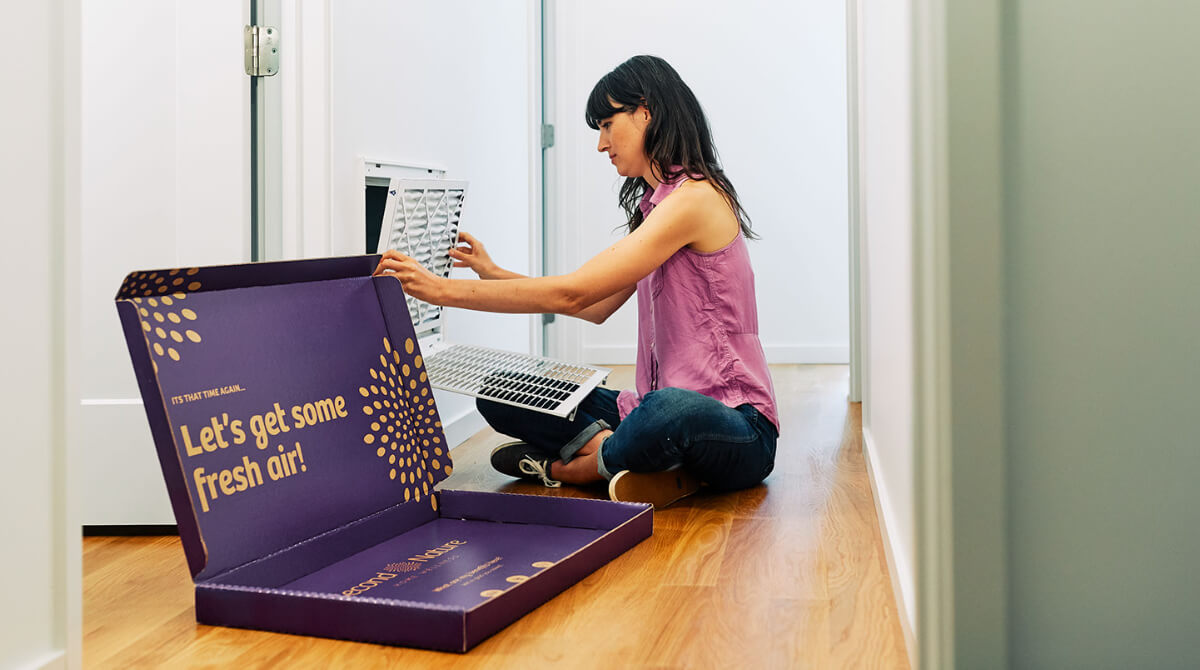
Blog_Header-1

Triple Win Property Management Blog

How To Manage Your Pollen Allergy

These tips will help make pollen season much more tolerable. While springtime is beautiful, it can cause problems for people who suffer from hay fever or pollen allergies. Plants and trees release pollen during springtime to initiate the reproductive process with other plants and trees. Pollen can be carried by the wind for several miles. According to Pollen.com, “Allergic Rhinitis (commonly called hay fever) is a reaction caused by inhaling airborne particles, such as pollen. Out of the more than 67 million Americans who suffer from allergies, 24-40 million suffer from an airborne allergy, such as hay fever. ‍ Symptoms of a pollen allergy include: sneezing, congestion, nasal discharge, itchy or watery eyes, itchy nose or throat. Visit a doctor in order to determine whether hay fever is causing the symptoms. Doctors can recommend over-the-counter antihistamines or prescribe a stronger allergy medicine. There are also several ways to limit exposure to pollen. Try limiting the amount of time spent outdoors during peak pollen times. The pollen count is highest during 10 a.m. and 4 p.m., so experts recommend limiting time spent outdoors during this timeframe. ‍ Visit the American Academy of Allergy, Asthma, and Immunology’s website to find out what the pollen count will be in a particular area each day. The daily pollen forecasts are calculated by time of day, temperature, rainfall, and weather forecast. Although pollen forecasts are not foolproof, it’s a helpful tool to help gauge the daily pollen count. ‍ WebMD.com recommends, “Avoid drying clothes on a clothesline. Take off shoes before going inside to avoid tracking pollen indoors.” Keep windows and doors shut, and rely on air conditioning instead. While limiting time spent outdoors during peak pollen hours will reduce exposure, it’s also important to limit indoor pollen exposure. Here are a few ways to do that: Keep pets outdoors during allergy season since they would track pollen inside. Change clothes after arriving home each day. Take a shower to remove pollen. Get a high-quality air filter. Air filters can remove up to 95% of pollen from indoor air. Vacuum and dust regularly to reduce the amount of indoor pollen. ‍ By following these simple steps, individuals can limit their exposure to pollen and make springtime a much more enjoyable season.

Calendar icon February 6, 2023

Read more

Prepare your Fireplace & Chimney for the Winter

Winter is coming. By all, we mean people with chimneys. And by grave danger, we mean your energy bill could go up. If your first thought when you read chimneys was “pffft, who cares, I don’t even use mine,” well then this is definitely something you should read. You’re in more danger than anyone. ‍ You’re not alone though. A lot of people don’t use their chimneys anymore. That doesn’t mean that you can just ignore it. There’s a lot of heat to be lost through a dormant fireplace, and as we all prepare for colder weather, there is not a better time than now to get caught up on how to prep your chimney for the cold. ‍ Use a fireplace sealer A fireplace sealer is designed to seal your fireplace. Often a chimney balloon is what people use as a fireplace sealer, and these things are actually pretty neat. It’s literally a massive balloon that you shove up your chimney and inflate. It then holds your warm air in and keeps that frigid winter air out. You’ll have to measure your chimney’s dimensions to make sure you get a balloon that expands to the appropriate size. ‍ A balloon that’s too big won’t be able to inflate all the way, and a balloon that’s too small will just fall down the chimney. The bottom of the smoke shelf is a popular place to install your balloon, but chimneys with smoke shelves vary in width throughout them. This is why it’s crucial to know where you want to place your ballon before you purchase it so that you can measure that particular area. ‍ Once the balloon is situated correctly, make sure to create a reminder for yourself that it is up there if you intend to use the fireplace. Some balloons come with a card designed to be stuck near the fireplace as a reminder. If you purchase one that does not, just write it on a note card and glue it to your forehead so you won’t forget. We’re kidding, taping it to the fireplace will do. ‍ The reminder card will stop you from accidentally lighting a fire with the balloon still inside the chimney. If you happen to do this though, don’t worry too much. You’re not going to smoke yourself out of your house. You’ll just need a new balloon. ‍ Still want to use that Fireplace? That's Okay Some folks will still want to use their fireplace through the winter. After all, that’s the best time to build a fire. If you fall into this group, a chimney balloon is probably not for you. Continually having to deflate and inflate that thing would turn it into more a nuisance than anything else. Luckily, you can still stop your chimney from sucking the money right out of your wallet this winter. ‍ Make sure that the chimney is as close to sealed as it can get. Without a balloon, it won’t be completely sealed, but by making sure the damper is closed, you can cut off a decent amount of air flow. The damper is nothing more than a small flap inside your chimney flue that can be opened or closed to alter the flow of air and smoke in and out of your chimney. Keeping this closed when the fireplace is not in use will at least help with insulation. ‍ Make sure your chimney is capped as well. There are many different kinds of chimney caps available, but the general premise remains the same across most of your options. A typical cap is rectangular shaped with wire mesh sides to allow smoke and air through, but with a solid metal top. This prevents junk like debris, rain, snow, and even animals from getting in your chimney. Without a cap, Fall can be a problematic season for chimney owners with all the leaves and other debris that come down from trees. If you don’t cap your chimney, you could be in for an unpleasant surprise next time you open your damper. ‍ Be sure to inspect your chimney and fireplace, or pay a professional to do it. Cracks in the walls of the chimney are a great way to fail the insulation test, and there are other apparent dangers with a compromised chimney. Brick chimneys are the most at risk as the mortar between them can break down. ‍ A professional chimney sweep (like the guys in Mary Poppins, except not like that) is a great resource. Typically, we support DIY fixes, but we also understand how much of a pain it can be to clean a chimney. It’s also not something to slack on, as a dirty chimney can become a serious fire hazard. Having your chimney professionally inspected on a yearly basis before the winter is a good practice. Previously, we discussed the value of spending some money on adequately insulating your home. These tips remain relevant if you’re planning on using your fireplace as well. Making sure windows and doors around the fireplace are sufficiently sealed will cut down on the amount of heat that can escape your home. This may not save you a ton of money, but it will make the fire more enjoyable and effective at warming your home. ‍ Enjoying some time by the fire is always nice once the cold weather rolls in. If you love to do that, or even if you don’t, you should be aware of the potential impacts your chimney can have on your energy bill.

Calendar icon February 6, 2023

Read more

How to Reduce Pet Dander and Pet Odors

Love your pets without worrying about their impact on home wellness. When you open your home up to lovable little furballs, you often adopt the pet odors and pet dander that come with them. Wondering what kills pet dander and odor? Fortunately, there's a lot of ways to help your house smell like normal people live there instead of doubling as a kennel. In this post, we’re sharing a few tips for how to reduce pet dander in your home and how to get rid of pet odor for good. How to Get Rid of Pet Dander Baking Soda: Man’s True Best Friend Baking soda is a fantastic neutralizer, which is why it’s top of the list for how to get rid of pet odor. Ever had anyone recommend you leave baking soda in the fridge to eat up weird smells? The same concept applies outside of the fridge, too! All you have to do is sprinkle it on your most pungent areas and it should absorb most of the smells, especially if you're dealing with pet urine. Then after a few minutes, vacuum up the baking soda. ‍ Now you may have heard similar claims with vinegar. So, does vinegar kill pet dander? While vinegar is also a great deodorizer but be careful using it if you have cats in the house. The smell of vinegar is similar to ammonia, which is similar to the smell of pet urine, which can attract them to continually mark or pee on certain locations. Dealing with cat dander? Learn proven tips to get rid of cat dander in your home and the allergies that come with it. ‍ If you want something more specific than baking soda or vinegar solutions, enzymatic cleaners are also a great way to target pet urine stains and smells. ‍ Keep Pet Accessories Clean Does your dog or cat have a favorite (conveniently machine-washable) toy? Do you use the same harness and leash every day on your walks? Is the dog bed completely covered with fur, dirt and other lovely doggy byproducts? ‍ Clean up! Clean out food and water dishes regularly. Throw toys, leashes, pet beds and other accessories into the washing machine (or wash by hand). ‍ Wash Your Human Accessories, Too When it comes to how to get rid of pet dander, along with odor, you’ll have to clean some human things too. If you let your pets onto the bed or couch, you're going to have to keep those areas clean too. Target the areas where your animal stays regularly and make sure they're vacuumed and free of pet hair and dander. ‍ Change Your Air Filters on a Regular Basis So not to be biased here, but changing your air filters consistently (especially if you have more than one pet) is a highly effective way to help deal with pet smells. If you have allergies or guests who may be allergic to your animals, it's also just the considerate thing to do in the long term. ‍ Because pet dander is microscopic, you’ll need an air filter with a high MERV rating to ensure it catches all those pesky particles. Not sure what size air filter you need? No problem. Check out our complete guide to air filter sizes. ‍ Brush Your Pet(s) at Least Once a Week Brushing is not only a way for you to further bond with your pet but also keeps the fur from flying and is how to reduce pet dander. Some sources recommend brushing your pet daily but it also depends on the length of your animal's fur - the general guideline is long-haired animals are best brushed daily (to prevent tangling and matting of fur/hair), medium-haired animals are best to be on a weekly basis and short-haired animals can go a few weeks but at least once a month is best. ‍ Clean The Dander Traps You may need to incorporate some new areas into your cleaning regime or restrict the areas that your pet plays to keep Sparky away from some of the more common pet dander trap areas. Follow these quick tips for how to get rid of pet dander: Do not allow pets near your bedding. Bathe your pet weekly, at least. Keep pets off of the couch. Vacuum soft surfaces (aside from the normal carpet vacuuming) like drapes, curtains, sofas, and stairs. Consider replacing carpet with hardwood floors or selecting a home that has more hardwoods than carpeting, as carpets are a HUGE trap for pet dander. ‍ We understand your pets are a part of the family and that you want to keep them around as long as possible. We also understand that you want to know what kills pet dander and odor the fastest. By implementing these tips, you can significantly reduce (if not eliminate) pet odors and pet dander from your home. Not only will your home be more pleasant without pet odor, but reducing pet dander improves your indoor air quality. If you or your family have allergies or asthma, you can reduce allergy symptoms and asthma triggers by fighting pet dander in your home. So, what are you waiting for? You know how to reduce pet dander and odor. Hop to it!

Calendar icon February 6, 2023

Read more

Saving Money While Using Your Washing Machine

Improve the efficiency of your washer to save money. In the previous two installments of this series, we’ve looked at how changing your light bulbs and sealing your home from drafts can save you hundreds on your energy bill. Now, in part three, we will be tackling a third perpetrator of high energy bills: The washing machine. We’re doing this metaphorically, of course. Nobody is literally tackling a washing machine. That would be very difficult and hurt a lot, and it would have no impact on your energy bill. ‍ Your washing machine and its co-conspirators, the dryer and the dishwasher, drive up your energy bill with one key thing: heat. All these machines use heat, and they use a lot of it. Understanding why and what it goes to is step one in cutting down energy consumption from these appliances. ‍ A washing machine consumes an astounding amount of energy to heat water to the requested temperature. Even if your washing machine is pulling from your hot water heater, this can cost you quite a bit of coin over the course of the year. So we’d like to introduce to you our groundbreaking new lifehack that eliminates all of the unnecessary energy use that comes with using hot water: don’t use hot water. ‍ Most people have heard something at some point regarding energy savings and washing your clothes in cold water. What you probably don’t know is just how much energy you are saving. Roughly 90% of the energy used by a washing machine throughout a load cycle is used to warm the water. That’s a staggeringly high amount of energy use, and therefore charges on your electric bill, that can be eliminated with just the press of a button. ‍ There are other reasons to make this simple change as well. Hot water runs colors. Cold water is not nearly as likely to turn your white shirt pink. Warm water breaks down dyes in your clothes, stripping the colors from your reds and other brights and adding that coloration to your whites if you happened to wash them together. ‍ Make sure to use the proper detergent if you should decide to make the switch to cold water washing. Cold water detergents, such as Tide Cold Water, are specifically designed to initiate chemical reactions at lower temperatures, effectively removing the need for washing with warm or hot water. ‍ Your dryer is costing you money as well. Unlike the washer though, there isn’t a simple switch to flip here that saves you 90%. That doesn’t mean a few easy practices can’t make your home more energy efficient. If you have the opportunity and the time, not using your dryer at all will cut down most significantly on its energy use, obviously. Got a warm sunny day? Why not use a clothesline to dry your garments? And you can air-dry clothes inside with a drying rack. ‍ Eliminating dryer use altogether is obviously the most effective approach, but it’s rarely practical and sometimes impossible. When it’s time to turn on the dryer, consider using the fastest spin cycle available to minimize drying time. Also, consider doing it at night. Some power companies offer discounted rates for using electricity during non-peak times, and taking advantage of this is an easy way to save a couple of bucks. Just contact your power company to see if they participate in this practice. ‍ And if you’re in the market for a new washer and dryer, you can always find a set that includes energy-saving modes and a dryer that is ENERGY STAR Certified. Front-loading machines also consume less energy because they spin faster. ‍ Just like the washer and dryer, you can trim down energy usage from your dishwasher by targeting its use of heat. Dishwashers, believe it or not, are also serial offenders when it comes to the unnecessary use of warmth. Many of these machines use hot air to dry dishes, which unsurprisingly is one of the biggest energy draws for which they are known. Turning off this feature and allowing your dishes to air-dry is the easiest way to defeat this issue. It might take a little longer, but you can count the dollars you’re saving while you wait. Use a rinsing agent such as Jet-Dry or Cascade to avoid spots that heat drying is typically tasked with removing. ‍ Do you have any other energy-saving tips you'd like to share? Let us know on social media. We'd love to hear from you!

Calendar icon February 6, 2023

Read more

What Are The Germiest Places in Your Home?

What places harbor the most bacteria in your house? The answers might surprise you. So you want to know what the germiest place in your home is? (We’re assuming this since you were kind enough to click on our blog post). Well, the answer might surprise you. Most people associate germs with things they find disgusting, and as a result, would guess something like the toilet is the nastiest place in your home. It’s not, though. In fact, it’s not even close. Let’s get started with number one. Dish sponges Kitchen sink Toothbrush holder Bathroom faucet Countertops Remotes and controllers Keyboard Dog items ‍ Dish sponges According to a 2011 study conducted by the National Sanitation Foundation, dish sponges are the single germiest place in your entire home. It makes sense, too, if you think about it. Sponges are the perfect place for bacteria to live, breed, and party it up. Sponges suck up water and stay moist because, well, they’re sponges, and they hold plenty of food from scrubbing dishes for bacteria to eat. 86% of sponges within the sample tested by the NSF were identified as having mold or yeast, while 77% had coliform bacteria, which includes the dreaded E. coli. To clean dish sponges, you can soak them in water and microwave them, which is a prevalent cleaning method that will kill bacteria. You can also run them through the dishwasher on heated dry. You should clean your sponges after each use, as they soak up nasty bacteria like a, well, sponge. You should also go ahead and replace your sponges every two to four weeks to keep your kitchen sink area free and clear of nasty bacteria. Kitchen sink Many people would guess that the bathroom is the germiest room in your home, but the kitchen is certainly here to give it a run for its money. Kitchen sinks are harborers of food scraps, and you don’t typically dry them out after use, making them another appealing place for bacteria. According to the same study by the NSF, sinks were again frequently full of coliform bacteria and mold. 45% of sinks tested were positive for coliform, and 27% were positive for mold, which is a significant step down from the dish sponge, but still pretty gross. You don’t have to be too careful about how you clean a kitchen sink. You can scrub it down with some disinfecting spray and a towel or sponge, preferably an unused sponge. You can plug it and fill it with warm soapy water and bleach. ‍ Toothbrush holder This one is a little more surprising but starts to make sense as you think about it. Mouths are germy, and a toothbrush’s job is to remove food and stuff from your teeth. You then typically rinse your toothbrush but don’t actually clean it with anything other than hot water. So naturally, the place that holds these items is going to become a refuge for bacteria. NSF noted it as the third germiest place in your home overall, but with notably larger amounts of mold and yeast than what is found in your kitchen sink. Regardless of the specifics, you should clean your toothbrush holder more regularly. An easy solution to this is to buy a toothbrush holder that is dishwasher safe and run it through the sanitize cycle that many modern dishwashers come with. If that isn’t an option, you can always wash it out with soap and hot water and then wipe it down with a disinfecting wipe. That should do the trick. ‍ Bathroom faucet This one should be obvious. The three things you touch between using the bathroom and washing your hands are the flush lever on the toilet, the faucet handle, and the soap pump. All of those things are, as a result, very germy. Of these three things, the faucet handle tested positively most consistently for coliform and mold growth. This, in addition to the faucet spout itself, should be cleaned often. You may not have time to do so daily, but you cannot clean these too often. A simple wipe down with a disinfecting wipe or spray should send those bacteria packing pretty quickly. ‍ Countertops Lots of things make their way onto your countertops. Food scraps, water spills, and bags that have been at the grocery store can all be germ couriers that deliver coliform bacteria to the tops of your beautiful marble countertops. While these certainly aren’t the gathering place for bacteria that some other kitchen items on this list are, it’s still a good call to disinfect your countertops. Know how to clean your specific type of countertop, though. Some don’t stand up well to hard chemicals such as bleach, and you’ll need to opt for a soap and water treatment. Remotes and controllers Unlike the germiest places in your home, remotes don’t hold moisture or come in contact with food scraps, well, unless you are doing something very weird with it. They get touched by a lot of different hands, though, and they are very rarely ever cleaned. Hands are basically public transportation for germs, so anything that is frequently picked up is going to have some germiness. The NSF study noted that more than 50% of TV remotes and nearly 60% of video game controllers have measurable populations of yeast and/or mold. You know your kid is not cleaning his game controllers. Clean these things, people! A wipe down with a disinfecting wipe is just fine. Please do not put your TV remote in the dishwasher or the sanitize cycle on your washing machine. Take two seconds to wipe these handheld devices, and you’ll be glad you did. Keyboard This one may surprise you, but the keyboard on your desktop or laptop computer is one of the germiest places in your entire home. It’s worse than your toilet seat. Much like the TV remote, it’s touched a lot and virtually never cleaned, allowing it to become very nasty gradually. The NSF study identifies keyboards as the single germiest “personal item” in your home. 68% of keyboards tested in the study had yeast and mold on them. That’s a higher percentage than your toilet seat, your kitchen sink, your bathroom doorknob, and almost every other thing tested. Your keyboard isn’t likely to carry other kinds of bacteria, which are generally considered more hazardous to your health than mold, but a good cleaning is still always recommended. Keyboards are very hard to clean. A can of compressed air will help blow out debris and other grossness that gets caught within the keys. You can disinfect with a standard disinfecting wipe. Just be careful not to allow any moisture to seep under the keys, especially if you are using a laptop. ‍ Dog items They say a dog’s mouth is cleaner than a human’s. A dog’s mouth is not cleaner than a human’s, and the stuff your dog puts their mouth all over ends up being pretty disgusting. Pet toys and bowls can be full of gross bacteria including dangerous infectious types like staph bacteria. You should clean your dog’s bowl regularly. Scrubbing with soapy water is really all that is necessary. Not all dogs love toys, but if your dog is a toy dog, clean hard toys, such as rubber chewables and stuff like that, with soap and water weekly. Soft toys can be run through your washing machine’s sanitizing cycle.

Calendar icon February 6, 2023

Read more

Receive articles straight to your inbox

Guide to Hydroponic Indoor Growing Systems

Indoor growing can be fast, easy, and fun with a DIY hydroponics setup. Last month, we gave you the ins and outs of how to start your own vegetable garden. Now, with summer heat in full swing, toiling in that summer heat can be exhausting. So why not move the garden inside? Move the garden inside? That sounds like a lot of dirt on the floor. Actually, there is no dirt involved at all! No soil in the garden? Do . . . do you not know how gardens work? Of course we do. We're talking about hydroponics. Ahhhhh yes, hydroponics. What's hydroponics? Merriam-Webster's dictionary officially defines hydroponics as "the growing of plants in nutrient solutions with or without an inert medium (such as soil) to provide mechanical support." In layman's terms, it's the process of feeding plants the nutrients they need with a water-based solution instead of naturally through the soil. Advantages of growing hydroponics A plant growing in a hydroponic system can grow around 30% faster than a plant grown in traditional soil. This happens because the plant does not need to expend energy in search of nutrients within the soil continuously. Instead, the nutrients are carried right to the plant, and that energy goes to growth. A hydroponic system can use as much as 95% less water than traditional soil-based growing methods. Since the system is enclosed, water used in the growing process is not exposed to the outside world, which reduces evaporation. Environmental conditions don't play a large role in the success of your crop. Since your plants are growing inside, factors like weather conditions and soil type won't impact the growth of your crops. You have a lot more control over the growing conditions. Disadvantages of growing hydroponics Hydroponics can be an expensive hobby. There are lots of different types of hydroponic systems (we'll get into those later), but top-end systems can cost more than $500 alone. Fortunately, there are more affordable DIY options. In traditional gardening, the soil stores nutrients that the plants can access on their own. In hydroponics, there is no nutrient storage. That means you're feeding the plants directly. If something breaks in your system or you forget, your plants will end up just like your Digipet. As long as you can ensure that your plants will receive the appropriate amounts of nutrients and light, you can set up a hydroponics system pretty much anywhere, including in the comfort of your own home. Pre-constructed systems are available for purchase online, which can become quite expensive, or you can have some fun and make your own. The choice is yours. Before we start though, here are a couple of terms you should know. Growth tray - Where the plants themselves will sit Reservoir - The bucket or tank that will hold the nutrient solution Nutrient solution - A mix of water and key nutrients plants need to grow and will be supplied to the plant roots Growing medium - the material that the plant will lay roots in (not present in every system) How do you build your own system? Building your own hydroponics system can be as simple or as complex as you would like. There are some really simple types of systems that require little effort to set up, and there are some really serious investments you can make. Deciding what kind of system is right for you is the first step. Since we're betting against most of you wanting to build a $5,000 hydroponics wonderland—because who has time for that?—we're going to focus on the smaller-scale systems that are best for building in your home. Wicking systems A wicking system is the most basic hydroponic system around and it's great for getting started in hydroponics. It has been called the "training wheels of the hydroponic world" and for good reason. It's easy to set up and use, making it the perfect system for first-timers. This system has seen some innovation, but the general concept is older than hydroponics itself. All you'll need are two containers, your plant of choice, a growing medium, and a wick (hence wicking). SN Tip: Growing medium is inert, which means it won't decay, and it provides no nutritional value to the plant. It exists to provide structural support, and that's about it. Common mediums include things like vermiculite or perlite, but just about anything that will give the plant support and allow it to root can function as a growth medium. Sand is another example. This wick does not have to be anything particularly specific. A piece of rope or string will work fine. You set up the system so that the reservoir sits below the growth tray. You then run your wick or string from the solution in the bottom container up into the growing medium in the growth tray, as pictured. SN Tip: The reservoir and growth tray can really be anything. As long as it can hold a solution, it should work. On a small scale, you can use bottles. Large plastic tubs will also work. Source: offgrid.com Fill the bottom container with the solution and the top with the growing medium and plants and you're done. Capillary action will move the nutrient solution up the wick and into the growth tray with consistency that will allow the plants to intake the nutrients and grow. SN Tip: Capillary action has a very sciencey definition, but all you need to know is that it's the movement of water or another liquid across a surface against gravity. The physical properties of water make this possible and it's what allows a wicking system to work. SN Tip: fill the bottom reservoir as much as possible in order to minimize the distance the solution has to travel. The advantage of the wicking system is that it's super easy to set up and maintain. The disadvantage is that it won't supply nutrients to the plants at the same rate as some of the more complex systems, so the variety of plants that can be grown in a wicking system is a little smaller. Plants that don't "drink" as much, such as smaller plants like lettuce or different types of herbs, grow best in a wicking system. SN Tip: Wicking systems also don't require the use of a water pump to deliver the solution to the plant roots, making it a "passive system." Those that do require a pump to move the solution to the plants are referred to as "active systems." Deep Water Culture (DWC) systems A DWC system is a little bigger and a little more complex than a wicking system, but all in all, it's still relatively simple. This system differs from a wicking system in that it submerges your plant's roots in solution 24/7 instead of a growing medium that is supplemented by the nutrient solution. ‍ Image: offgrid.com Because of this, it is critical that the aquatic environment the plants live in is properly managed. pH and oxygen level management are quite important with the DWC. An oxygen pump is necessary to ensure that oxygen levels remain sufficient. Setting up a DWC only requires one reservoir and does not need a growth tray. The reservoir is filled with a nutrient solution, and the air pump is installed to ensure the appropriate amount of dissolved oxygen. SN Tip: Smaller DWCs are harder to manage because it's challenging to keep nutrient concentration, dissolved oxygen, and especially pH levels consistent. The plants themselves are suspended above or on top of the liquid solution in net pots. Net pots are simply pots with holes in them that allow roots to sit underneath the pot and submerged in the solution. There are several different ways to install the net pots in a DWC system. You can float them, where you attach a flotation device to each pot and allow them to rest on top of the solution. The second option is to suspend your plants in the air above using a brace or a roof with holes in it. The actual process of doing this depends on how you construct your reservoir, but the image below will show you a good example. Image: aquaponicsexposed.com Nutrient Film Technique (NFT) systems An NFT system is among the most popular hydroponic systems. It's an active system that requires a water pump to run, but other than that it is set up very similarly to a wicking system. Image: offgrid.com Like the wicking system, an NFT has both a reservoir and a growth tray. Unlike the wicking system, a pump is used to move the solution from the lower reservoirs to the growth trays (or upper reservoirs), where it flows across the tray and drips back into the lower one. The system also requires an air pump to ensure the water is properly oxygenated. NFT, like any active system, requires a little more maintenance because the water does not reach the plants naturally. You're dependent on your pumps to keep the plants receiving the nutrient solution. If a pump goes out, your entire garden is at risk. Thankfully, this isn't common (pump technology isn't particularly complex), but it is something to stay aware of. Other systems An ebb and flow system and a drip system are similar to NFT systems, with the lone difference being how the solution is supplied to the plant. An ebb and flow system uses a pump to flood the growth tray the plants reside in periodically, draining it shortly thereafter. It's like an NFT except it doesn't push the solution through continuously. A drip system is also similar to an NFT, but instead of filling the upper reservoir with nutrient solution, the solution is trickled from drip lines on top of the plants in the growth tray, where it then percolates through a growth medium and falls back into the reservoir. SN Tip: Because of the recirculation of these systems, pH and nutrient amounts can change frequently, so consistent monitoring is recommended. How do I manage pH? pH is an absolutely critical element of a functioning hydroponics system. A pH level that is all out of whack can cause plants to die from insufficient nutrient uptake or, believe it or not, too much nutrient uptake. For anyone who didn't pay attention in eighth-grade science class, pH is a measure of the acidity of a liquid. The scale runs from 0–14, with lower numbers being more acidic and higher numbers being more basic. For reference, battery acid has a pH of 0, water has a pH of 7, and drain cleaner has a pH of 14. The reason this is so critical is that the solubility of nutrients changes at different pH levels, which affects the ability of the plant to absorb these nutrients. If the plant has trouble absorbing nutrients from your solution, growth will be stunted, and the plant will eventually die. If levels are too high and the plant absorbs higher than acceptable amounts of nutrients, it can die from poisoning. You can have the coolest hydroponics setup in the world, but if your pH is off, all your plants will still die. SN Tip: There are multiple ways to test your pH. The easiest and cheapest are pH test strips, which are extremely quick and easy to use and available at any gardening or pet store. You simply dip the strip in the solution, swish it around for a manufacturer-specified amount of time, and then match the color it turns to the color on a corresponding table that comes with the test strips. As you'll see below, many plants prefer a slightly acidic nutrient solution. It's necessary to continually test your solution to ensure it remains at the right pH. If you find it needs adjusting, you have a few options. The easiest is adding "pH up" or "pH down" chemical solutions. These are readily available at the store or online. Follow the manufacturer's instructions for how much to add and be sure to check your pH frequently. What can you grow in a hydroponics system? You can grow just about any type of fruit, vegetable, flower, or herb. Ideal growing conditions will vary by plant, and some are more suited for specific system types because of it, but almost anything can be grown with hydroponics. Hydroponic lettuce and hydroponic tomatoes are some of the more common items to "plant" in your system. Lettuce, in particular, is one of the best plants for beginners looking to dive into the world of hydroponics. The leafy green is easy to grow, will grow in a wicking system, and can be harvested in just one short month. Fruits like strawberries and the aforementioned tomatoes (a tomato is a fruit, deal with it) have a slightly longer grow time, but are good starter crops as well. Below you'll find some popular plants and key details needed to succeed at growing them. Lettuce pH range: 6.0-7.0 Grow time: 1 month Difficulty: Easy Tomatoes pH range: 5.5-6.5 Grow time: 2 months Difficulty: Easy Strawberries pH range: 5.5-6.5 Grow time: 2 months Difficulty: Easy Spinach pH range: 6.0-7.0 Grow time: 1.5 months Difficulty: Easy Bell peppers pH range: 5.5-6.5 Growth time: 3 months Difficulty: Easy Hydroponics is a fun way to grow your own fruits and vegetables from the comfort of your own home. It can get complex and expensive, but it doesn't have to be if you don't want it to be. Simple and easy systems exist that will allow you to enjoy fresh homegrown produce at your dinner table. You know what else you can make simple and easy in your home? Air filters, with Second Nature. Never forget to change your filter again.

Calendar icon February 6, 2023

Read more

What is an OEM Filter & Do I Need One

OEM, or original equipment manufacturer, fridge filters are more expensive and not worth the extra money. What is OEM OEM stands for original equipment manufacturer. In the world of refrigerator water filters, an OEM filter is a water filter manufactured by the same company that made your refrigerator. What is a replacement filter? The manufacturer of your refrigerator is not the only place you can purchase your fridge filter from. In fact, there are companies that make replacement filters of equal or higher quality that you can sometimes get for a better price. Do you need OEM? In truth, no. Fridge manufacturers would like you to believe that you do, but there are replacement filters available that are totally compatible with your refrigerator. And not only are they compatible, but they’ll often cost you less and offer higher quality filtration for your drinking water. Take a look at the chart below that pits OEM filters against comparable offerings from Second Nature. ‍ Maytag UKF8001: $49 Second Nature's It Matters: $39 ‍ Try It Matters ‍ Why alternatives are easier In the case of Second Nature, replacement options are easier than tracking down your OEM fridge filter because you only have to buy it once. You select what you need only one time, and it’s shipped to you automatically for each scheduled changeout of your refrigerator water filter. Pricing is also simplified with Second Nature's subscription service. You pay $29 or $39 depending on which brand you'd like, and that's it. No variation in price based on size or type of fridge filter. ‍ But will replacements offer the same quality? Absolutely. It Matters by Second Nature will filter more than 99% of lead from your drinking water. It's certified to meet NSF 53 and 42 standards, just as your higher-quality OEM options are. You can depend on It Matters to remove the same contaminants that your OEM will, including chlorine, lead, turbidity, asbestos, and VOCs.

Calendar icon February 6, 2023

Read more

What Does MERV, MPR & FPR Mean?

Air filters are rated by several different metrics and systems, depending on a variety of factors. Second Nature makes filters easy by breaking these ratings down and utilizing one standardized metric-MERV. What is a MERV rating? MERV ratings were established by the American Society of Heating, Refrigeration and Air Conditioning Engineers (ASHRAE) in order to aid consumers understanding of what type of air filter will best fit their home’s needs. ‍ MERV is the worldwide standard rating system for air filter quality. The MERV, or Minimum Efficiency Reporting Value, tells the consumer how effectively a filter can catch household contaminants such as dust, pollen, and pet dander. The higher the MERV rating (anywhere from 1 to 16), the more and smaller particles are filtered from the air. ‍ MERV Ratings. Typical Applications 1-4 Residential Window Units 5-8 Better residential, commercial & industrial 9-12 Superior residential, better commercial, hospital labs 13-16 Hospital, general surgery ‍ It is important to keep in mind that MERV indicates the minimum ability of a filter to catch airborne particles. Over time, a filter begins to fill with dust and dander, therefore increasing its ability to stop contaminants from passing through. However, the higher the MERV, and the more a filter has already caught, the harder it becomes for your system to draw in air. A high MERV rating may seem like a good idea to a homeowner who wants to ensure they are breathing fresh air, but it is important to make sure that your HVAC system is capable of handling the restrictive properties of a high MERV filter. Home air filters with higher MERV ratings also need to be changed at a higher frequency due to their higher efficiency and particle-catching abilities. Simply put, they catch more contaminates over a shorter period of time. ‍ MERV vs FPR FPR, or Filter Performance Rating was developed by the Home Depot, based on independent lab test results comparing MERV ratings. It is used strictly in Home Depot stores and does not correlate directly to MERV ratings. ‍ MERV vs MPR MPR, or Microparticle Performance Rating, was created by 3M to rank their filters’ ability to catch the smallest airborne particles. MPR is helpful when comparing one 3M Filtrete filter to another, but it does not directly translate to MERV. ‍ MPR vs. MERV vs. FPR The chart below shows the associated values for each of Second Nature's filter types. MERV MPR FPR Essential MERV 8 MPR 600 FPR 5 Essential+ MERV 10 MPR 1000* FPR 7* Health Shield MERV 13 MPR 1500 - MPR 1900 FPR 10 *approximate values

Calendar icon February 6, 2023

Read more

The Complete Guide to Air Filters

From sizes to types to qualities and more, here is everything you could ever need to know about air filters. The world would look different without air filters. Air wouldn’t be as clean, HVAC systems would be blowing up all over the place, and I, the author, would be unemployed. Thankfully, we have air filters, though, and if you’re new to the world of air filtration, you’ve come to the right place. Here at Second Nature, we’re not experts in a lot of things. We don’t know anything about movies, nobody here can teach you quantum physics, and the meaning of life is still a mystery to us too, but air filters? We’ve got that. What is an air filter? An air filter is a semi-permeable shield that stands between your HVAC system and the air inside your home. It looks like this: What does it do? It filters air. As your HVAC system pulls air from your home to cool or warm it, the filter intercepts that air in your ductwork. It acts as a barrier for anything carried by the air that you don’t want in your home. This includes things like dust, mold spores, pollen grains, pet dander, and a bunch more junk. That stuff gets caught by the filter and clean air moves on without it. Why do I need one? Because Indoor Air Quality is an increasingly significant problem in the United States. According to the EPA, the air inside your house can be significantly more polluted than the air immediately outside. This is because of the concentration of pollutant sources and the fact that air can stagnate inside a sealed building. An air filter helps remove pollutants and particles that would otherwise freely float about inside your home. Not only does this make the air you breath most often cleaner and safer, which promotes personal health and home wellness, but it also keeps gunk from reaching your HVAC system. HVAC breakdowns can occur because of particle buildup on the actual coils of the system, and breakdowns are costly to fix (assuming they can be fixed at all). We can all agree that being without A/C in the winter or summer sure would suck. Yes, A/C is used to heat and cool your home. It stands for Air Conditioning. It’s quite literally conditioning your air to be warmer or cooler. You’re welcome. So I just buy one and leave it in there? Nah, you got to change that filter. A filter will eventually fill up with gunk and become less permeable, allowing less air through and forcing your HVAC to work harder. This can, at best, drive your power bill up and, at worst, burn out the motor, which again will cost you thousands. Second Nature recommends using a pleated air filter (you can read more about what that is below) and changing it every three months. As stated by the Department of Energy, this will keep your HVAC system running smoothly and can actually lower your power bill by 5–15%. Oh, and did we mention the health benefits? So what does this all get me? Well, a healthier home for starters, which in turn delivers a healthier you. Filters catch allergy inducing pollutants like pollen and dust, but they also catch pathogens like bacteria if you’re using a sufficient quality filter. According to a NAFA Foundation Report, a filter with a high MERV rating can significantly reduce the risk of contracting infectious diseases such as influenza, rhinovirus (common cold), and tuberculosis. According to the study, upgrading from a MERV 4 filter to a MERV 13 filter can cut the risk of contracting influenza almost in half. Just from using a different air filter. So pick a quality filter and get started protecting the air in your home.

Calendar icon February 6, 2023

Read more

Everything You Need to Know about Lead in Drinking Water

Lead is often the number one concern for homeowners about their drinking water. What is lead? Lead is a naturally occurring metal that is toxic to humans and animals. Before the breadth of the risk of lead exposure was known, it was commonly used in a lot of household materials including pipes, which lead was a seemingly great material for because of its malleability. Lead cannot be seen, tasted, or smelled when dissolved in water. ‍ How does lead enter my drinking water? The most common way that lead enters your drinking water is through your pipes. Lead pipes that carry water into your home will suffer from corrosion over time, which will release some of the contaminant into the water it is carrying. This corrosive effect can be increased by certain factors, namely the acidity of the water. Acids are generally corrosive materials, so more acidic water will result in more corrosion. ‍ Lead pipes, being the hazard that they are, were banned from use in the construction of new plumbing systems in 1986, but many plumbing systems in the US pre-date the ban, thus still including components that contain lead. A 2016 survey found that around 30% of water systems around the United States still contain some amount of lead components. What are the effects of lead in my water? According to the EPA, lead can be a health hazard even at very low levels of exposure, particularly in small children. Lead accumulates in the body over time, so even exposure to a very low concentration can result in health effects if it continues for long enough. ‍ Infants on a formula diet consume large amounts of water relative to their body mass and are at higher than average risk of exposure to higher than acceptable concentrations of lead. The EPA lists the risks associated with lead exposure in children as follows. Behavior and learning problems Lower IQ and hyperactivity Slowed growth Hearing problems Anemia ‍ How do I remove lead? ‍ Lead can be removed via filtration, which can be done in a number of ways. If you get water from your refrigerator, you’re already drinking filtered water, although there’s a good chance your current filter does not capture material amounts of lead. A lead filtering refrigerator water filter will be certified to meet NSF 53 standards, which denotes that the filter has been certified to remove a contaminant with a health effect. That contaminant doesn’t have to be lead, but it usually is. ‍ This is the case with It Matters by Second Nature, which is certified to meet NSF 53 standards and removes more than 99% of lead in your drinking water. ‍ Try It Matters ‍ Can I test for lead? Unfortunately, it’s not enough to just know whether or not your home’s plumbing system contains lead. Water can come in contact with lead pipes prior to ever reaching your home, but you can get a definitive answer as to whether or not you should be concerned about lead with a test. ‍ Some information about your area’s general exposure is available online, but a test is the only way to get an exact answer for your home specifically. DIY tests can be purchased online and provide some insight for only around $20. Rarely are these tests super reliable though, because of a lack of precision in the design and user error. A State certified laboratory, on the other hand, will test a water sample for you and deliver much more precise and insightful results.

Calendar icon February 6, 2023

Read more

How to Get Rid of Cat Dandruff or Dander

Learn how to get rid of cat dander in your home and reduce allergy symptoms. Calling all cat lovers. Does your skin frequently turn red when Whiskers scratches or licks you? Do you ever feel your eyes start to water when Abraham Linkitten falls asleep anywhere remotely close to you? ‍ If any of these questions have you nodding in agreement, we’re here to inform you that this is not just you crying from cuteness overload, and in fact, you might be one of the 3 in 10 Americans who suffer from a pet allergy. ‍ We know that finding a new home for Leonardo DiCatrio is not an option, so with today’s blog post, we’re going to talk about how to get rid of cat allergies and reduce cat dander in your home so you can comfortably cuddle with your cat all day long. ‍ Why do you have a cat allergy? What is cat dander exactly? How to get rid of cat dander STEP 1: Make sure your cat is healthy STEP 2: Groom your cat STEP 3: Clean your home STEP 4: Change your air filter ‍ First, let's start with the basics: ‍ Why do you have a cat allergy? Contrary to popular belief, the main culprit behind your allergies isn’t your pet’s fur, it’s their dander. (Other animals have dander too, so learn how to reduce pet dander for your other furry family members.) When you feel that familiar tickle in your throat, it’s the reaction of your immune system playing things safe and trying to fight off allergens. Every cat produces dander, so having a non-shedding cat or one deemed a “hypoallergenic animal” will offer little relief for your allergy symptoms. So when it comes to how to get rid of cat allergies, we need to talk about how to reduce cat dander. ‍ What is cat dander exactly? Dander refers to the microscopic pieces of dead skin that animals with fur or feathers shed into their surrounding environment. You might be wondering, “What does cat dander look like?” but it is so small that it can’t be seen by the naked eye. Since its defining characteristics are being tiny and lightweight, dander has no problem remaining suspended in the air for long periods of time. Its rough edges allow it to easily latch onto the surfaces in your home, especially those that are softer like bedding and upholstery. ‍ Since cat dander can glide through the air and hook onto clothing without much difficulty, it can even spread to places where no cat has been before. ‍ One of the reasons that cat dander is a major allergen is because of a protein called Fel d 1, which is commonly found within the skin, urine, and saliva of cats. Research shows that male cats produce less of this protein than female cats, so if you’re a first-time cat owner, it may be in your best interest to adopt a Mrs. Sparkles instead of a Mr. Sparkles. ‍ Siberians, Balinese, and Russian Blues are low shedding cats that would all be good options for those with severe allergies because they produce less of the Fel d 1 protein. ‍ My cat has dandruff Cat dander vs dandruff, what’s the difference? Cat dandruff is the visible white flakes of dead skin that can be found in your pet’s fur. If you find a large quantity of dandruff in your cat’s fur, it can be a sign of a medical problem. Dander, on the other hand, is microscopic and completely normal for cats to shed. Both dander and dandruff contain the Fel d 1 protein that is responsible for your allergies. ‍ Want to know how to get rid of cat dandruff? Keep reading and follow the same first two steps to reduce cat dander in your home. How to get rid of cat dander & dandruff So, what are we going to do about all of this? Don't worry, we've got four easy steps for you to help significantly reduce dander in your home. This way you can stop sneezing every four seconds and fully appreciate the companionship of your furry pal. Here’s how to get rid of cat dander: ‍ STEP 1: Make sure your cat is healthy If it seems like your cat is producing more dander than they should be, a trip to the vet may be in order. A skin test can help you find out whether your cat has problems like mites, yeast, or fleas that cause excess dander production. Obesity and diabetes are also conditions that will cause your pet to produce an abnormal amount of dander. Check with your vet to figure out the best treatment plan for your furry friend if they are suffering from any of these ailments. ‍ You know what they say, you are what you eat. If your cat follows a healthy diet, their overall well-being will improve. Give your cat food that is packed with natural ingredients and especially high in omega 3 fatty acids. Meat should always be near the top of the ingredient list. A healthy cat will help reduce cat dander in your home. ‍ In addition to reducing dander, omega 3 fatty acids help keep your cat’s coat healthy, strengthen their immune system, reduce irritation and dryness of the skin, and prevent joint pain. ‍ STEP 2: Groom your cat Bathing your cat is the first step to having a well-groomed pet. We know, we say “bathe your cat”, you hear “start an apocalypse”. ‍ If your cat is extremely opposed to water, abort bathing and skip over this section for other grooming ideas. ‍ If you are an allergy-sufferer and are wondering exactly how often to bathe a cat, it’s recommended that you bathe your cat once a month at the minimum, but every one or two weeks would be ideal. This is one of the best ways to remove cat dander from your home. Don’t bathe your cat more frequently than that, however, because overbathing will most likely irritate your cat’s skin, causing them to produce even more dander. ‍ If possible, start bathing your cat when they're just a kitten so that they'll be more used to the concept by the time they're an adult. ‍ To make things easier for you, we created a step-by-step tutorial on how to approach this aspect of grooming your kitty. Don’t worry, this won’t be Mission ImPAWsible (sorry, couldn’t resist). ‍ How to bathe a cat (without getting scratched) to reduce cat dander: Bust out the laser pointer and tire out your cat before the big event. This will help keep them as calm as possible. Playing with your cat near the site of bathing may also reduce their anxiety in this environment. Make sure the sink or tub where you’re planning on bathing your cat is equipped with non-slip material like a bath mat. A wet towel or an old t-shirt also works great for this purpose. Have your cat shampoo and conditioner on hand. We recommend using a natural cat shampoo with oatmeal and aloe vera to soothe your cat’s skin and keep it moisturized. Create a mixture of water and shampoo (about 1 part shampoo and 2 parts water) to make it easier and quicker to rub the soap into your cat's fur, as well as rinse it out. Bring your cat to the tub/sink and if you don’t have any assistance, use a harness with a leash. Strap your cat into the harness and then wrap the leash around the faucet. Slowly massage shampoo into your cat’s fur. Then make sure to thoroughly rinse it all out because any lingering chemicals will potentially irritate the skin and lead to increased dander production. Using conditioner can also further moisturize your cat’s skin to keep it from drying out. Dry off your cat with a towel, or if they permit, a blow dryer on the lowest heat setting. Start your very own cat bathing business because that went so well! Nice work, we’re proud of you. ‍ How to groom a cat without water to reduce cat dander: We understand that for some cats, water is public enemy number one and bathing is completely out of the question. If that’s the case, we have some alternative grooming solutions to keep your furry friend happy and your allergies at bay: ‍ Damp cloth Dander-removal spray Brushing ‍ If your cat is as “allergic” to water as you are to their dander, try using a damp cloth instead to gently wipe down their fur. Add cat dander removal spray to the mix and this is a surefire way to reduce the amount of dander in your home. All you have to do is spritz the cloth a few times and then move it first in the opposite direction of the fur, and then the same direction. This should be enough for the spray to do the trick and reduce dander buildup on your pet’s skin. ‍ In addition to other grooming methods, it is also recommended that you brush your cat’s coat about three times a week to remove fur and dander that would otherwise become airborne. If your pet has longer fur, it would be best to do this daily. ‍ Remember, grooming your cat regularly is also how to get rid of cat dandruff and keep your kitty sparkling clean. ‍ Grooming your cat regularly can also help remove any dust or pollen that may be lingering in your cat’s fur and contributing to your allergy symptoms. ‍ STEP 3: Clean your home When it comes to how to get rid of cat allergies, it’s not just your furry friend that needs cleaning. You can reduce cat dander by giving your whole house a wipe-down. We’re talking leave no hardwood unswiffered, no carpeting unvacuumed, no counter unwiped, no filter unreplaced- you get the gist. It’s time to bring out that all-purpose cleaner and get down to business. ‍ Clean all fabric Softer surfaces like bedding, couches, drapes, curtains, and rugs are all going to be hot-spots for dander. We recommend throwing your drapes, rugs, and couch covers (if you have them) in the washing machine a few times a month to get rid of as much of the allergen as possible. Lint rolling your drapes and couches at least once a week can also be effective if washing them is too much of a hassle. ‍ Wipe down surfaces The second step to cleaning your home is to eliminate as much cat dander as possible from every surface in sight. The best way to tackle this is with either a soapy rag or a natural all-purpose cleaner and towel. Counters, walls, doors, and cabinets are all fair game for prime dander hideouts, so a quick wipe down is extremely helpful in keeping your home as allergen-free as possible. ‍ Make sure to pay special attention when cleaning the places your cat visits the most. This includes all of your cat’s toys, their bed, and on top of that one kitchen cabinet (we don’t know how they get up there either). ‍ Don’t let your cat into your bedroom This is easier said than done, we know. Keeping your cat out of your bedroom will at least keep the source of the allergens out of your sleeping environment. If you currently sleep with your cat and feel your allergies acting up at night, consider purchasing a pet bed and placing it in a different room. If you or your cat are against this idea, make sure that all of your bedding is machine washable. ‍ Vacuum the carpets Cat dander can easily become lodged within the fibers of your home’s carpeting, and the constant influx of people and pets walking around will uproot that dander straight back into the air. Vacuuming at least once a week is essential in keeping your carpet and home as dander-free as possible. ‍ Clean the litter box Your cat’s litter box can be a goldmine for allergens, so it’s best to be extra careful when cleaning it out. If possible, keep your pet’s litter box in an area of the house that you don’t frequent, like the garage or basement. Wondering how to clean a litter box? Scrub it down with a natural detergent or some baking soda, then rinse it out with warm water. Just make sure to thoroughly clean out any remaining soap residue. ‍ STEP 4: Change your air filter Where there are cats, there should be regularly replaced air filters. This is the final and most simple step (also our favorite) for how to reduce cat dander and keep your home as dander-free as possible! Since dander is commonly airborne, it will often have a presence within your air ducts, resulting in your HVAC system redistributing the particles back into the air in your house. The only way to break this cycle is by using a high-quality air filter that will trap these small particles before they can even think about making you sneeze. An air filter with a MERV rating of at least 11 should be a staple in every pet owner and allergy-sufferer's home. However, our Catch All filter (MERV 13) would be better suited for pet owners that have more severe allergies. We recommend replacing your filter every three months at the minimum to ensure that it’s operating at maximum efficiency. If you have more than one pet in your home, changing your filter every 1 to 2 months will likely be better for your home’s air quality. ‍ If you find that you need to adjust the frequency of your filter changes, we know of a great subscription service with a convenient custom scheduling option. Try it out right over here. Now you know our best tips for how to get rid of cat allergies, dander, and dandruff. Taking preventative measures in your home will go a long way in managing your allergy symptoms. Regularly grooming your cat, cleaning furniture and flooring, and replacing your air filter are all simple steps that you can take to reduce the amount of cat dander in your home. ‍ Cats regularly rate our boxes 5/5 stars. ‍ Now, what are you doing? Groom that cat, vacuum that floor, and change that air filter.

Calendar icon February 6, 2023

Read more

Everything You Need to Know About Chlorine in Drinking Water

You might be surprised to learn what the actual number one concern is with chlorine. What is chlorine? Chlorine is technically a naturally occurring gas that can be found on the right side of the periodic table, but with regards to practical applications in water, it’s used to disinfect water in a process called chlorination. It’s common knowledge that this is used in swimming pools, but it’s also done in your drinking water to prevent you from drinking nasty microbes that will make you sick. How does chlorine get into my drinking water? Unlike lead, it’s put there on purpose. Chlorination is part of the water treatment process that makes water safe for people to drink. It can be done at different points in the process, with a variation of chlorine-containing compounds, and the goal is, as mentioned, to deactivate pathogens in the water that can make you sick. What are the effects of chlorine in my water? Chlorine can actually be an extremely dangerous material, but it isn’t dangerous in your drinking water because of the low concentrations it exists in. According to the CDC, water with a concentration of chlorine of 4 parts per million is safe to drink. Believe it or not, the primary concern with chlorine is actually the effects it has on taste and odor. Chlorinated water can have a metallic taste to it that you may find unpleasant, and an odor to go with it. This comes from what’s known as residual chlorine, which remains in the water as it travels to your home in order to protect against pathogens it may encounter along the way. How do I remove chlorine? Chlorine can be filtered out. It doesn’t need to be for health reasons, but you may find it tastes better with a filter that removes high amounts of chlorine, something you can do with an activated carbon fridge filter. A refrigerator water filter certified to meet NSF 40 standards will remove the taste and odor of chlorine. Each Sip by Second Nature, for example, will filter out more than 50% of chlorine, not completely removing all of the disinfecting material, but capturing enough residual chlorine to improve taste and odor. ‍ Try Each Sip

Calendar icon February 6, 2023

Read more

Can Air Filters Protect You From the Flu?

Studies suggest they can. We know that air filters help your indoor air quality. We know that they filter allergens like pollen and dust out of the air and that they protect your HVAC system from exposure to lots of crud that can cause breakdowns. But can air filters help fend off sicknesses as well? ‍ Obviously, air filters aren’t going to make you immune to sickness, but can they filter pathogens like the flu virus out of the air? The answer may surprise you, or it might not, depending on how much you know about air filters. ‍ The experiment So can air filters actually decrease your chances of catching certain infectious diseases? Well, yes, according to a recent study from the Illinois Institute of Technology. The study, which was prepared for NAFA by Dr. Brent Stephens of the aforementioned institution, set out to determine the effectiveness of HVAC filter filtration on the probability of an individual contracting infectious diseases. The study can be found here, but it’s a ton of reading with lots of words, so we’ll summarize it for you. ‍ The experiment used a risk of transmission equation known as the Wells-Riley Model to test air filters of different MERV ratings and their respective ability to remove droplet nuclei from the air. ‍ Now, what on earth does any of that mean? ‍ MERV: rating scale from 1-16 that grades the effectiveness of air filters. An 11 is solid. Droplet nuclei: Droplets are little particles of moisture that you expel through your mouth and nose when you breathe or cough. These droplets contain particles within them, some of which are pathogens. As the moisture evaporates, the particles within remain together suspended in the air. They form the droplet nucleus. This is commonly how airborne diseases get transmitted. Wells-Riley Model: This is just a math equation used to determine the risk of infection based on a number of factors such as the number of infector individuals, exposure time, and other things. ‍ Dr. Stephens used this model and some assumptions about the particle size of droplet nuclei to test the effectiveness of HVAC filters against these pathogen carrying particles and the subsequent effect on the risk of contraction. The tests were conducted in three hypothetical environments (office building, school, hospital) with three different infectious diseases per environment (Influenza, Rhinovirus, Tuberculosis). ‍ The Results The results of the experiment backed up the idea that increasing the MERV rating of your air filter can result in decreased risk of contraction of the tested infectious diseases. Below is the chart from the experiment, which illustrates the decreasing risk of Influenza in a school environment. ‍ ‍ The chart illustrates that, if no filter at all is used, there is a 32.3% risk of contraction if one person with the flu spends eight hours at a school of 35 people. Eleven people would be expected to contract the flu virus based on this. It’s worth noting here that if you use a filter, but it is a garbage one like a MERV 4 or fiberglass, the risk level does decrease, but minimally. ‍ However, opting for a MERV 13 filter cuts the risk level by about two-thirds, resulting in seven fewer people getting sick under the exact same circumstances. Below are the charts for Tuberculosis and Rhinovirus (common cold), which follow similar trends but with less risk in general, as they are less contagious diseases than Influenza. The trend holds true in the office and hospital setting also. You can see those charts here. ‍ Source: Wells-Riley & HVAC Filtration for infectious airborne aerosols, NAFA Foundation Report ‍ So should I use a better filter? You should. Using a MERV 13 filter will not make you immune from the flu or other viral infections, but, according to the study, it can decrease the odds of you or a family member catching it in your home. MERV 13 filters, such as Second Nature’s Health Shield, are about the most effective filters against small particles you can buy short of the HEPA variety. The experiment projects a MERV 13 filter will catch about 87% of droplet nuclei that pass through. A MERV 4 is only expected to catch 11%. So yes, you should opt for a better air filter.

Calendar icon February 6, 2023

Read more

Meet the Monster that's Killing your Indoor Air Quality

Are candles bad for you? Yup. How bad? Real bad. It breathes fire. It throws smoke up into the sky above. It is the monster that is ravaging your indoor air quality. It is . . . the candle. No, seriously. Why are candles bad for you? Candles are part of a roll call of unassuming objects that, if used improperly, can do serious damage to your home’s air quality. Common wax materials and wicks can emit relatively nasty air pollutants when burned. ‍ Are scented candles bad for you? Hate to break it to you, but scented candles can be even worse, and both varieties unload decent quantities of soot into your in-home atmosphere. Don’t worry though. You don’t have to give up the ambiance of candlelight—at least, not just yet. There is still hope for the future of your candlelit dinners. ‍ ‍Why is paraffin wax bad and what to do about it? Your everyday candle is typically made of something called paraffin wax. Why is paraffin wax bad? Because it’s made from petroleum, which will throw all sorts of nasty garbage into the air if you light it on fire. This is quite inconvenient, as lighting it on fire is kind of the whole point of a candle after all. Some examples of this “nasty garbage” include acetaldehyde, formaldehyde, and polycyclic aromatic hydrocarbons. Even if you have no idea what those things are, you can probably assume from their lengthy chemistry sounding names that you don’t want them floating around in your house. And you would be correct in that assumption. These compounds can lead to respiratory issues, asthma, and other conditions that you definitely don’t want. ‍ "Additionally, burning a candle wick yields a smoke soot that floats into your air and may take days to settle out of the air. Smoke particles settle at a rate of 2” per day when in areas with no air flow. Homes have an abundance of airflow thanks to their HVAC and people and pets moving. MERV 13 ( our Health Shield filters ) are built to capture particles the size of smoke particles. All other filters will allow smoke particles to flow right on through and land on your HVAC equipment and enter back into your loving environment. Have you ever seen a vent on the wall that has black soot hanging outside of it? Chances are there has been smoke in the house."- Second Nature COO Kevin Barry ‍ Paraffin wax-free candles that aren’t as bad for you So, are paraffin candles bad? Yes. But luckily, there are some worry-free alternatives. Getting rid of the paraffin is step one. While paraffin is the wax of choice for most candle makers, there are also other types of candle wax. Beeswax candles hold a higher price tag, but this safer and more natural material is well worth the extra dollar or two. These things don’t pollute your air with unpronounceable molecules and come with the added bonus of a natural honey scent. ‍ Another option is soy. Soy candles don’t have the naturally occurring scent that Beeswax does, but it’s lower burning temperature allows the candle to last as much as 1.5x longer than your standard paraffin wax candle. Soy also burns just as clean as its beeswax competitor, making both types great alternatives to paraffin. ‍ Make candles safer with a little thing called an air filter So, are candles bad for you? Paraffin wax ones, for sure, are. But choosing alternative wax candles minimizes health risks. You can also make your candles a bit safer with the magic of air filters. ‍ Beeswax and soy varieties unload significantly less of the nasty black soot into your home that paraffin is known for (even though all candles will produce some). Regularly changing your air filters will allow them to do their job of keeping that candle refuse out of your home’s air. ‍ So don’t be afraid to light up some candles (as long as your filters have high MERV ratings–13 or above). That romantic candlelit ambiance is still possible, as is that creepy haunted house vibe if that’s what you’re into. You do you. All we want is for you to do it in the cleanest and safest air possible. ‍ Not sure what size air filter to get? Learn about air filter sizes and how they work to remove candle soot from your home.

Calendar icon February 6, 2023

Read more

How Do I Know What Size Air Filter I Need?

Where do I find my size? Air filter sizes can look a bit intimidating, especially when a great deal of homes have multiple filters of different sizes. Second Nature is here to make filter buying EASY. Once you enter your filter sizes with us just once, not only will you not have to remember when it's time to change them, but you will no longer need to remember those tricky sizes. ‍ In order to find the size of pleated filter(s) used in your home, you need to look no further than your existing filters. On the outer frame, you will see at least one set of numbers. If you see two sets of numbers, the filter size needed to order replacements is the nominal size, not the actual size. You can ignore the actual size printed on your filter for this task, as the nominal size is the number set needed to order new filters. ‍ Your filter size (again, referencing the nominal size for your filter here) will look something like this: 20" x 20" x 1" or 20" x 25" x 1" or 14" x 20" x 2" ‍ The size of your pleated air filter is always presented in a string of three numbers, with the first number representing the length, the second number representing the width, and the last number representing the thickness. ‍ If you’re still not sure what size filter(s) your home needs, feel free to reach out to us.

Calendar icon February 6, 2023

Read more

Clean Air And Apartment Living

Air circulation is not always great in an apartment. As you probably know all too well, one of the benefits of apartment living is NOT air circulation! Small or enclosed living spaces can cause pollutants to collect in your indoor air. These irritants remain stagnant in your space, just like that cousin who said he’d crash for “just a couple nights” (two months later, he’s still there!). In fact, the EPA states that indoor air can be even more polluted than outdoor air! ‍ Let that sink in; think about the smoggy haze that lingers in heavily polluted cities. Yes, the air in your home may contain even more pollutants than THAT. ‍ And, it’s no secret that property management companies don’t typically change the air filters on a strict schedule (and sometimes, not at all!). If they do, most of the time they use the cheap filters that don’t actually clean your air. ‍ All of those irritants floating around can wreak serious havoc on your health, such as: Allergic reactions Wheezing Sneezing Coughing Respiratory issues ‍ There is hope, though! Whether you are moving into a new apartment or staying put, there are simple steps you can take to better the indoor air quality in your place. ‍ If you’re on the hunt for a new place, there are a number of factors to consider. First, look for upgraded heating and air conditioning units. If you live in a city of older buildings, then consider ensuring that you safeguard yourself from those old units with air filters that will keep them from blowing dust or mold into your place. ‍ Proper ventilation and a layout that allows for the optimum level of airflow (basically, an open floor plan) is a plus too. Hopefully an easy criteria to fill, since open floorplans are all the rage right now. ‍ Just looking to improve the indoor air quality of your current residence? Here are some tips for that too: Keep your apartment clean and dry (we know, not as easy as it sounds!) Promote air circulation Keep the humidity levels in the sweet spot - between 30 and 50 percent. You can easily measure this with a hygrometer! (We promise, it’s less complicated than it sounds.)

Calendar icon February 6, 2023

Read more

How Do I Reset The Water Filter Light On My Refrigerator?

Tired of that annoying light indicator on your refrigerator? Here's how to reset it! Like everything else in this world, every manufacturer has their own “unique” way of doing things. We’ve included the instructions for the most common fridge brands below. ‍ Amana - push the Auto Light and Dispenser Lock buttons on the dispenser (simultaneously) and hold for 4 seconds until you see the refrigerator filter status indicator light begin to flash. Once it flashes, release the buttons. Some Amana refrigerator models may require you to push and hold the Water and Dispenser Lock buttons for 4 seconds until you see the filter status indicator light begin to flash. Then, release the buttons. ‍ Electrolux and Frigidaire - push the reset button on the water dispenser and hold until you see the green light flash (this can take up to 15 seconds). GE and Hotpoint - press the Reset Water Filter button on the dispenser and hold for 3 seconds. ‍ Jenn-Air and Maytag - push the Lock and Light buttons on the dispenser (or Lock and Water on newer models) and hold for 4 seconds until you see the indicator light blink. ‍ KitchenAid and Whirlpool - push and release the light switch a total of 5 times within 10 seconds. If you see a Filter button on the refrigerator, push and hold this button for 5-10 seconds. ‍ LG - push the Reset button and hold it for 3 seconds. ‍ Samsung -push the Child Lock and Ice Type buttons at the same time and hold for 3 seconds. (Do not hold the buttons longer than 3 seconds. If the two buttons are held simultaneously for 5 seconds, the reset function will stop. In this case, let go of the buttons and repeat the procedure once more. The water filter indicator light will change to green.) ‍ Don’t see your brand here? Feel free to reach out to us at help.secondnature.com or call us at 1 (800) 308-1186. We’re always happy to help!

Calendar icon February 6, 2023

Read more

Where Are My Air Filters Located

Where in my house are the filters? While it’s crucial to change out your air filters regularly, you won’t get far if you do not know where they are supposed to go! Whether you recently moved into a new home or your better half (you know, the responsible one) isn't around, here are some tips and clues you can use to make your search easier. ‍ Changing the filters in the HVAC unit In this case, your air filter is most likely located right next to your furnace or air conditioning system air handler. The air handler is the large metal box containing the fan and fan motor. Typically, the unit would be found in a basement, an attic, or sometimes in the back of a closet. Once it is located, look for a slot where an air filter should fit. What you are seeking is a 1" wide hinged or removable cover. If you have a thicker filter that is 4" or more, the slot should match accordingly. There should already be a filter placed in there, which will confirm that you found the right spot! It will depend on your unit, but it can be orientated vertically or horizontally. Just make sure that your airflow arrow points towards the unit! If you looked everywhere and you still cannot find any possible place to put in a filter, there is no need to panic! It just means that you need to use a return vent. That, or you might have to update your eye prescription. Changing the filters in a return vent The air handler pulls air in from the house through the return duct system, and then blows the air through the heating or cooling system and back into the house through the duct system. The air filter is typically located at the point where the return duct enters the air handler. ‍ Larger houses often have more than one HVAC system. Each system will typically have at least one air filter. Therefore, your home may have filters located at the air handler AND in the returns. You should check each possible location to make sure you have found all of your filters. ‍ Since HVAC units are usually hidden away in smaller and less convenient spaces, some homes are set up for air filters in return vents. Return vents are often in the wall but can be in your ceiling or even the floor. The vent will be rectangular or square and should be larger than a standard air duct vent. If you already know the filter sizes that your home needs, that is a good hint for the shape of the return vent that you need to find. ‍ Once found, the cover of the return vent can be removed by pulling a tab or unscrewing a bolt. For the latter, an ordinary coin should do the trick to loosen it, similar to a standard screwdriver. Place the cover to the side and remove the old filter. Place the new filter in the same way as the old one. Pleated filters have one side that has thin metal wiring and another side without. When installed in the return vent, the side with metal should be facing away from you and should not be seen. The purpose of the wiring is to keep the filter's shape. Since the vent is pulling air inwards, it is more efficient for particles to collide with the plain side of the fibers. Finally, put the cover back, throw away the old filter, and then find the next return vent. ‍ Case closed You should now be able to find all the spots where your filters need to be installed! If you are still uncertain and would like more assistance, a local HVAC technician would be able to find all the locations that need to be maintained easily. Just be sure to regularly check on your filters and change them out frequently to have clean air and a happy HVAC system! Or you could save some time by signing up for some pretty handy air filter subscription service. Just a thought.

Calendar icon February 6, 2023

Read more

Are Washable Air Filters Good For My HVAC System?

Are reusable air filters a good choice for me? Most of us aren’t really experts on the best type of filters for our homes, families, and lifestyles. When it comes to deciding on the type of air filter to use in your home, one factor tends to play the largest role in decision making: cost. Rightfully so, everyone wants to save money wherever possible. When individuals are looking for ways to save on home maintenance, they are usually excited to hear about washable air filters, and we totally get that. Although the concept is great and cost is relatively low, that doesn't mean washable filters are the best option for your home. ‍ One positive washable filters have over pleated filters is they don't have to be replaced as often. You simply vacuum and rinse. They cost between 50 and 60 dollars--what you could easily spend on traditional filters in just a few months. This consideration alone is enough to convince many homeowners that washable filters are the way to go. Although the low price is very appealing, they still need to be replaced around every 10 years. There are other incredibly important factors that surely outweigh the cost benefits. ‍ How do washable filters work? Washable filters are composed of multiple layers of vented metal. As air molecules pass through the first layer, they become positively charged by the friction of the air on the metal. Dust and other pollutants then attach to the other layers as they pass through the filter toward your system. ‍ 2 good reasons why washable filters are a bad choice: Washable filters rely on static electricity to operate and they can only filter out so much debris. Static electricity works well to filter out the smaller, lighter particles but when it comes to larger particles or mold spores, an electrostatic filter will not be as efficient as a MERV 11 filter. If someone in the house suffers from asthma or allergies it is better to opt for a high-filtration, replaceable filter rated at MERV 13. After dust and other particles initially pass through the first layer of the filter, not all of them are caught by the other layers. But the escaping particles still remain positively charged and can stick to components in your a/c system or the walls of your duct work promoting mold growth. Think that cleaning a washable filter is as simple as a quick vacuum and rinse in the backyard? This isn’t exactly the case. To properly clean the filter, it must be disassembled and each layer must be cleaned separately. More work than one might presume when purchasing the filter. Also, despite following the correct disassembly procedure, it may not always be cleaned properly, leaving your filter dirty even when you think it's clean. ‍ Improper filtration can lead to high repair costs or system failure! Pleated air filters can achieve more efficient filtration, while putting less strain on your system. You'll rest, and breathe, easy knowing that your air is actually clean and that you aren't slowly killing your HVAC system.

Calendar icon February 6, 2023

Read more