Blog_Header-1

Triple Win Property Management Blog

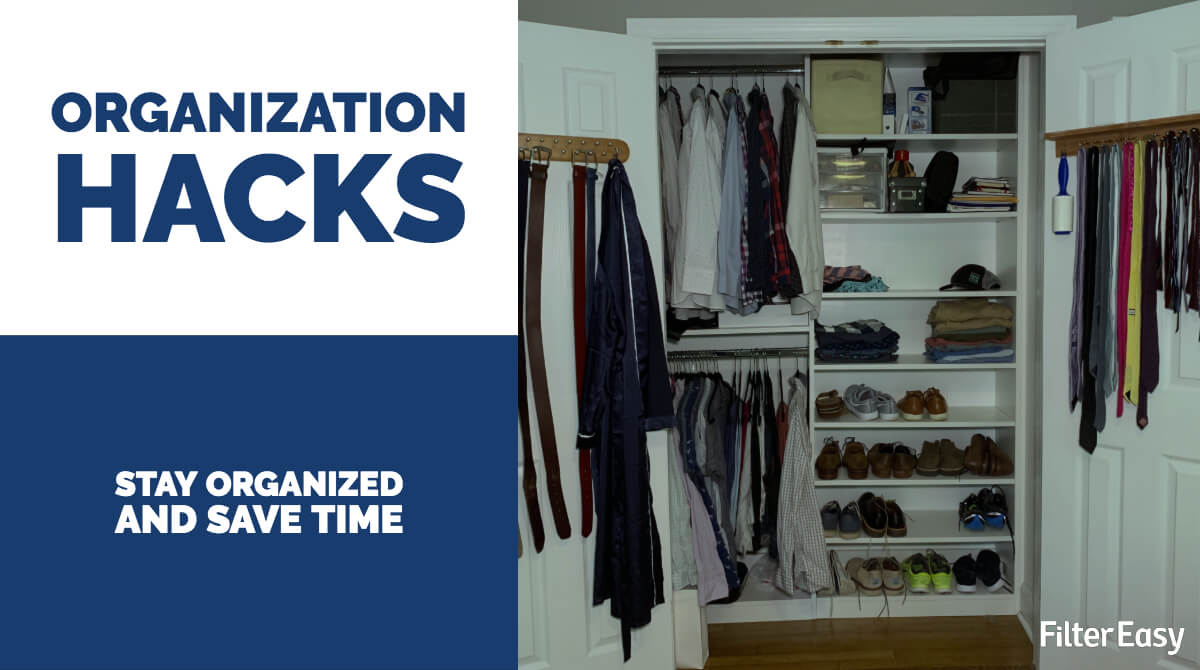
10 Organizing Hacks that Will Change Your Life (a little)

Be more organized in just five minutes Some studies have shown that the benefits of maintaining organization may stretch far beyond the obvious. Organization in your life can reduce stress and decrease the time required to complete tasks, which can lead to better eating habits, better sleeping habits, and better overall wellness. ‍ Unfortunately, being organized isn’t as common as you’d hope. The average American spends one year of their life looking for lost or misplaced items, and more than 25% of people say they aren’t more organized because they don’t have time to put organization systems into place. ‍ So while creating a comprehensive organization system would obviously be a good idea, who among us actually has time right now to put towards something like that? Apparently, about 80 million Americans don’t. There’s hope for us time-starved, hard-working adults. A little creativity goes a long way to make your home more organized and things more accessible. We’ve gone ahead and taken the liberty of being creative for you and came up with ten quick and straightforward ways to be more organized today—yes, right now. ‍ Double hang clothes with soda can tabs. Time: 5 minutes Cost: $0.00 Unless you’re someone that regularly gets rid of clothes you don’t wear, you probably don’t have a lot of closet space. You can clear some up without having to go spend money on closet organizers. Simply take the tabs off cans of soda (or whatever cans you’re drinking) and run the hook of a hanger through the top circle on the tab. Take a second hanger and run it through the bottom hole, and now you can double hang clothes and save some closet space. You could even triple hang clothes if you wanted, as well as put similar garments together to save time when looking through your closet. Use toilet paper rolls and shoeboxes to store cords. Time: 20 minutes Cost: $2.00 The ultimate challenge when it comes to staying organized is managing charging cables and cords for your electronics. Somewhere in everybody’s house is a drawer or bag packed full of chargers and headphones that without fail are tangled to the point of insanity. You can end that today. Take old paper towel or toilet paper rolls and line them up in an old shoebox. Simply glue or tape them to the bottom of the box and then store your cords inside the rolls. You could even label each one on top of the box and leave a corner for charging blocks. It may sound cheap (and we admit it is), but your cables will magically stay tangle free. Put sheet sets inside pillowcases. Time: 10 minutes Cost: $0.00 Keep your bed sheet sets together with what is probably the easiest hack on this list. After you’re done washing and folding sheets, stick the whole set inside of the pillowcase before putting them away. Now each sheet set will be kept together, and there’s no more searching for them in your linen closet. Wash socks in a mesh bag. Time: However long it takes you to put socks in a bag Cost: $5.00 Tired of losing socks in the mass of clothes in your washing machine and dryer? Of course you are. Take a small mesh bag and place all your socks in it, then only wash and dry the bag. All your socks will still get cleaned, they’ll stay together, and they’ll thank you. Jumbo clothespin mail sorters. Time: 10 minutes Cost: $15.00 Not many things can build up faster if they’re ignored than mail. Bills, junk mail, magazines, and other tree-killing wastes pile up if they aren't taken care of. It’s more stressful to take care of if you're trying to wrap your arms around disorganized chaos. Solution: purchase some jumbo clothespins, label them, and hang them on the wall, and you can have all your mail sorted and not taking up space on your counter or desk (and definitely not forgotten in your junk drawer.) The only caveat here is that you do need to take care of this mail because jumbo clothespins won’t hold 604 bills. They will eventually run out of space, but maybe that’s the extra motivation you need to take on the bills. Oh, and when it comes to bills, most companies allow for e-bills and automatic payments. Just a thought. Use bread bag tabs to label cords. Time: 10 minutes Cost: $0.00 Hack number two showed you how to take care of chargers and other electronic cords when they aren’t in use. What about the cables that are plugged in behind your computer? Have you ever had the problem of needing to unplug something and not knowing what is what in that powerstrip? Try labeling them with old bread tabs. Any time you buy a loaf of bread, save the little square tabs and label them with a corresponding cord, then hook them onto the wire and never again will you have to track cables to their devices to figure out what they go to. If you don’t eat bread, we’re deeply sorry. We’re sure your happy friends who still eat bread will let you have their leftover bread bag tabs. Store plastic bags in old disinfecting wipe containers. Time: 5 minutes Cost: $0.00 Every single home has a place somewhere where they have a bunch of grocery bags. You go grocery shopping, you bring home a bunch of bags, and you need somewhere to stuff them. Well, how about an old container of disinfecting wipes? It's big enough to hold quite a few bags, and you can pull them out one at a time like tissues, instead of picking through a huge tangled bunch of bags and having to fight for one. Use a magazine holder to keep tin foil and plastic wrap organized. Time: 5 minutes Cost: $15.00 There’s not really a great place for a bunch of rectangular containers like those that hold tin foil unless you’re willing to make your own. The good news is that making your own is quite easy and you won’t need to find a place to cram those things anymore. You can purchase a magazine holder for around $10-15. Just hang it on the back of the pantry door using a command strip or any other adhesive used on wood. Then take all your tin foil or saran wrap containers and store them there. They’ll be easy to get to and won’t take up the all too precious space in your kitchen. Hang trash bags on a paper towel roll. Time: 30 minutes Cost: $30.00 Ever tried to pull a new trash bag out from under the sink, only to pull like four out and take the box with you? One great way to save time and avoid potentially misplacing things is to hang your kitchen bags and trash bags on a paper towel holder. They already come in rolls, so all you have to do is hang up the holder. It’s as simple as finding an open area of a concealed wall (we imagine you don’t want your trash bags easily visible in your kitchen) and hanging a paper towel holder. Use a shoe organizer to store cleaning products. Time: 5 minutes Cost: $5.00 A shoe organizer is an excellent tool for organizing all sorts of things beyond just shoes. The slots are sized for shoes but can fit things like cleaning bottles, dress socks, or even cords if you need that much space for them. Cleaning products in particular, such as disinfecting wipes or sprays, are things you want to keep out of reach of the kids. Hanging them on the back of the closet door can be a great way to keep them organized and out of sight. You could even arrange them so that the bottles that are running low are on the bottom, making shopping lists easier. Hopefully, you can find some use in these quick, simple, and cheap organization hacks that can remove some small stressors from your life. We’d love to hear from you and any awesome organization ideas you have. Share your ideas with Second Nature on Facebook.

Calendar icon February 6, 2023

Read more

A Beginner's Guide to Weatherstripping

Do you know your weatherstripping? Drafts and air leaks exist in about every home in America. The edges of windows and doors are the primary enablers for this air outside your home to get inside your home and vice versa. Drafts may not seem like a major issue, but over time they can really drive up your power bill as conditioned air escapes, and they can introduce lots of foreign pollutants from outside into your home. In short, it's something worth fixing, especially since it usually takes about five minutes and 20 dollars to do so. ‍ So how do you actually accomplish this task? With the magic of weatherstripping. Weatherstripping is basically strips of materials that you adhere to doors and windows. These materials, if installed correctly, seal the edges of doors and windows when they're closed, preventing the movement of air any nasty stuff in the air. Pro Tip: Weatherstripping is commonly associated with wintertime, but it's just as valuable in the summer as it is in the cold months. How do I know if I need weatherstripping The first step in identifying where your home needs weatherstripping is to test for air leaks in places that are most vulnerable. There are a handful of do-it-yourself options for this, or you can hire a professional to conduct an energy audit. A professional energy auditor will give you precise answers to where you need weatherstripping, in addition to other useful information. ‍ If you wish to opt for the DIY versions, there are a couple ways to test for insufficient seals. ‍ The flashlight test This requires two people and it needs to be at night. So grab a friend, child, or spouse, promise to buy them a bottle of wine for their help (unless your children are helping—please do not buy wine for your children), and get to work. ‍ The test, which works best for doors, is pretty simple. One person takes a flashlight outside once it's completely dark out. Close the door behind them and have them shine the light all around the door and surrounding areas. If you can see light coming through at any point, that's a point where you have an insufficient seal and should consider adding weatherstripping. ‍ The moisture test The moisture test only requires one person and can be done at any time of day, but it's helpful if it's done on a cold day. If you're looking to save money this summer, you may want to pick a different test. ‍ The moisture test is also pretty simple. Wet your hand with some room temperature water and then feel your way around the edges of the door or window. The moisture will cause your hand to feel cold if it comes in contact with air from the outside (again, this only works on a cold day). If it feels cool, go ahead and add some weatherstripping. ‍ The dollar bill test This test is specific to doors and requires the use of a single dollar bill. Open your door and place a dollar bill in between the door jamb and the door itself, then close the door. Grab the bill and try to pull it out. If it slides out easily, time for some weatherstripping. ‍ The smoke test The final test you can try for a draft in your home is what we'll call the smoke test. This involves lighting a candle or match and holding it behind your door or window. Watch the smoke carefully for changes in how it moves. If incoming air effects the smoke stream, it's a good bet you're losing money and warm/cool air through a draft. Time to do some weatherstripping. ‍ The different varieties of weatherstripping Who knew weatherstripping could be this complicated? It turns out there are a ton of different kinds of weatherstripping, some of which perform better in certain situations than others. We're going to simplify this down as much as possible. ‍ There are several different varieties to pick from. We did some research for you, and hopefully, this can help you become a weatherstripping expert—or just learn what you need to make an informed decision. ‍ V-Seal V-Seal is probably the most common type of weatherstripping that is used within the home. Its name comes from the V shape that it takes when you fold it down the middle, which allows it to line the inside edges of window and door frames. It can come with adhesive backing for easy installation, or it can come without one and requires nailing in. If installed correctly, V-Seal can be among the most durable weatherstripping options. ‍ Felt Inexpensive and less durable, felt is sort of the "old news" of the weather stripping community. It's sold in rolls and can be installed stand-alone or with a metal strip for reinforcement. It's useful in doorways where it is affixed or nailed to the door jamb. That way, when the door closes, it compresses the material and blocks out air. It's important to note that felt does not work well in high moisture conditions. Felt is known as the cheapest and one of the easiest options. ‍ Door Sweep The type of weatherstripping best designed to seal out air coming in from underneath the door is what is known as the door sweep. Drafts usually exist at the bottom of doors facing outdoors, which is why this type of weatherstripping exists. You'll often find two options: a metal or plastic strip that you screw into the bottom of the door and a brush, or piece of nylon that extends to the floor (the sweep). If installed correctly, this will cover the entire space beneath the door. Some versions actually slide onto the bottom of the door instead of being nailed into the bottom of the door. ‍ Foam Tape Foam Tape is sort of like of felt except slightly more advanced. While the application is very similar, foam is of higher quality than felt. It usually comes with an adhesive backing for easy installation. Also like felt, it's one of the less durable options and should not be installed in high moisture areas. ‍ Rubber tubing This type of weatherstripping may have a variety of different names, but its construction is rubber with adhesive backing. Installation is similar to that of foam tape. Still, the rubber will last longer and is not as vulnerable in moist conditions. It can also provide waterproofing in addition to fighting off air leaks. ‍ Outlet Gaskets One place you might not expect to find an air leak is at your outlets and light switches, but surprisingly, these areas can be just as vulnerable to drafts as your doors and windows. Luckily, covers that seal up these places are cheap and take only a minute to install. It's as simple as removing the plastic covering from the outlet or switch, inserting the foam gasket behind it (make sure you punch out the holes first), and then reinstall the cover. That's it. That's literally it. You should be able to do your entire house for under $20. ‍ Weatherstripping is one of the easiest and most useful do-it-yourself tasks for your home. It's relatively inexpensive, can take only a handful of minutes to install, and will leave you knowing you made your home healthier and more efficient with this quick and easy DIY project.

Calendar icon February 6, 2023

Read more

How to Clean and Stain Your Deck this Spring

Which deck cleaners and stains are best for you, and how do you ensure a professional level clean without hiring a professional? We have a Spring! Winter appears to finally be releasing its grip on most of the country, giving way to warmer temperatures, blooming plants, and the incessant need to clean. It’s what we call Spring cleaning, and undoubtedly you’ve heard the term. ‍ If you’re ready to kick off spring cleaning but have no idea where to start, you’ve arrived at the right web address. With the weather warming and all of us itching to take advantage of the suddenly pleasant outdoors, preparing your back deck for usage is an excellent place to kick things off. So let’s do it. ‍ Prep your deck Chances are you haven’t spent a lot of time on your deck or porch over the last couple months, on account of the whole winter situation. Now that spring has sprung, it’s about time to take advantage of the milder weather that’s coming. ‍ Now at this time of year, your deck is almost certainly not in the best shape of its life. If you have a wooden deck, the lack of use throughout the winter has allowed the wood to lose its color a little, become stained as a result of leaves and tree bark being left on it, and be victimized by the growth of certain mildews. ‍ That’s normal though, and some spring cleaning will revitalize its look. Step one is to make sure that you clear everything off your deck. This includes any furniture, lights, or accessories that you may have out there. It also includes all the debris that has fallen during the winter and found a new home on your deck. Be sure to clear off leaves, tree bark, pine straw, or any other trash that nature left out there. ‍ It’s a good idea to sweep your deck of this stuff throughout winter, as dead leaves and other junk are responsible for pesky tannin stains that leave you with more work come spring. ‍ SN Tip: During this step, it may also be a good idea to move any potted plants near the deck away, as you will be working with chemicals. ‍ Clean your deck Step two is where you’re going to apply your deck cleaner. There are lots of different kinds of deck cleaners, but most professionals agree that a one-two punch of an oxygen bleach cleaner and an oxalic acid cleaner is the best and safest route. ‍ Oxygen bleach will target mold that has grown on and in your deck over the cold months. It’s non-toxic and breaks down into sodium bicarbonate and oxygen, which is the long way to say that it won’t be harmful to you or your deck, unlike the more common chlorine bleach. ‍ SN Tip: Apply cleaners to an inconspicuous area of your deck before covering the whole surface with them, so you can see what effect they will have without any risk. ‍ Oxalic acid is the follow-up treatment for the visual appearance of your deck. While ineffective against mold, which is why you need a one-two punch, oxalic acid will work wonders removing stains caused by leaves and debris as well as brightening the wood and refreshing the appearance of the wood. ‍ SN Tip: Oxalic acid is toxic, so be sure you know how to handle toxic materials and if you’re uncomfortable with it, consider alternatives, such as citric acid. ‍ Apply the oxygen bleach first with a stiff bristle synthetic brush. A synthetic brush is always better because it will last longer amid repeated uses involving chemicals. Spread the bleach across the deck with the brush while avoiding pooling of the cleaner in any spots. After rinsing, repeat this step with oxalic acid. ‍ We recommend this process, ending with a thorough rinse with a garden hose. You could also go the power washing route, but it’s critical to remember that most decks are made of cedar, redwood, or pine, all of which are softwoods. Softwood is, as the name implies, soft, making it vulnerable to scarring, stripping, and scratching. ‍ The intense pressure of a power washer can strip off the top of the wood, leaving indentations across your entire deck. If you’re determined to go the power washing route, you need to make sure the pressure isn’t too much for the wood to handle. Adjust the angle of the nozzle to decrease pressure and wash in a sweeping motion to avoid a consistent stream of pressurized water on the same part of your deck. A 40 to 60-degree angle is recommended by professionals such as the folks at decks.com. It’s also wise to pressure wash earlier in the year, as cooler temperatures will increase the wood’s density and make it slightly more resistant to the power of the pressure washer. ‍ If you don’t wish to go the pressure washing route, soaps and a regular garden hose will work great, and you’ll still have a product to be proud of without the risk of ruining your entire deck. Stain your deck The final step is to reseal if necessary. You probably stained and/or sealed your deck shortly after it was constructed, but it’s a smart idea to recoat it every two to three years. ‍ SN Tip: While a deck seal and deck stain are not technically the same thing, a quality deck stain will seal your deck effectively and give it a nice coloration of your choice. If you wish to maintain the natural look of your wood, use only a sealer. ‍ First, you need to test the current state of your stain. Drop a little bit of water on the surface of your dry deck, then closely examine the water droplets. If the droplets soak into the wood, it’s time to touch up your deck. If they just sit on top, there’s no need to break out the stain. ‍ If you find that you need to reapply stain, the process isn’t overly complicated. The most important part is to make sure the weather doesn’t ruin all your hard work. You don’t want the temperature outside to be too hot or too cold, but since you’re probably doing this in spring, that shouldn’t be an issue. ‍ Also, make sure you have a couple of days of dry weather and never apply the stain in direct sunlight. Rain will wash out the stain before it can set and a high sun beating on your deck will cause the stain to dry too quickly, stopping it from thoroughly permeating the wood and making the entire job a waste of time. ‍ Now the fun begins. First, identify any trouble areas where your stain is peeling off the wood. If you have none of these, congrats, you’ve avoided one step of this process. If you do, you’ll need to strip off any loose stain and sand it down to remove any abrupt or sharp edges. This will allow for a more uniform replacement coat. We talked earlier about power washers and how they can strip your stain and damage your wood if you use them on your deck without caution. Coincidentally, a power washer is a great tool when you actually do want to strip your deck. At the right pressure rating, your power washer will be able to rip off the loose parts of your stain without damaging the still functional parts of the coat. Use a power sander to sand down the area afterward. ‍ After the area has completely dried, use a paintbrush to touch up the stripped area. Apply stain to the entire area and allow it to dry completely. If you only have one trouble area and the rest of your deck’s stain is still kicking, you can probably be done here, although recoating the entire deck won’t hurt. ‍ If you have several trouble areas, it’s best to just recoat the entire deck. Use a paint roller to apply a thin coat of sealer to the top of your deck boards. Cover the entire deck while maintaining a thin uniform coat. Avoid pooling of the sealer and break out that paintbrush to ensure evenness in hard to reach areas. ‍ After your stain coat has dried, you’re ready to enjoy the outdoors and the (hopefully) nice spring weather from the comfort of your deck.

Calendar icon February 6, 2023

Read more

Five Easy Steps to Allergy-Proof Your Home

Here are five easy ways to make your home less conducive to allergens. For many of us, spring is the season of allergies. While it may be the worst season for a lot of people, allergies can be an all-year-long issue. It's true, the outdoors can be a treacherous place for a lot of people in the summer, fall, and even the dead months of winter. While you can't get rid of the allergens floating around outside, you can take steps to minimize the amount of allergens that can get inside your home. Here are five tips to allergy-proof your home. ‍ Wash clothes frequently Allergens can enter your home in many ways, with one of the most common involving hitching a ride on your clothes. The best way to counter this, obviously, is to wash your clothes frequently and at the right temperature. ‍ It's no secret that hot water is best. Hot water kills pesky allergens like dust mites and is more effective than cold water at removing particles like pollen from clothes. ‍ A study from the American Thoracic Society1 recently showed that washing clothes at 140ºF will kill 100% of dust mites. Washing at a still quite hot 104ºF will kill less than 7% of dust mites. That’s quite a big difference and essential for those with allergies. ‍ That's the upside to washing your clothes in hot water: it's excellent at cleaning allergens and particles out of them. The downside is that it costs more to heat the water to 140ºF, and not all articles of clothing can be washed in that level of heat. If you're not able to kill allergens with hot water, there are alternatives. ‍ Most newer washing machines out there have sanitize wash settings. This setting washes your clothes with super hot water of at least 165ºF, which well exceeds the temperature necessary to kill pests and germs. ‍ You can purchase allergen-targeting laundry detergent. This detergent formula contains an additive known as ACARIL, which effectively removes allergens from bedding and clothes during the wash cycle. It works absent of temperature, so you don't need to wash your clothes on high heat for it to work, and it is safe to use with all colors and fabrics. If you already have a detergent that you like, you can purchase ACARIL by itself. ‍ Consider hardwood An allergen's dream home would be made entirely of carpet. The floor would be carpet. The walls would be the carpet. The ceiling would be carpet. You get the point. ‍ A carpet allergy is a two-fold attacker. Sometimes you're allergic to the actual carpet itself and the materials used to make it. More often, you're simply allergic to the common allergens that get caught in your carpet and then released into the air when you walk on it. ‍ Carpet is a repository for allergens. Dust can build up inside of it with ease and be extremely difficult to remove. Particles like pet dander that feature jagged edges stick to carpet without any effort. In fact, all of these allergens are commonly found in household carpets. Pollen Dander Dust Mold Smoke Bacteria ‍ Indeed, some people are actually allergic to certain materials in carpets. But most people that have a "carpet allergy" actually just have an intolerance to an allergen that has entrenched itself in their carpets. One potential solution is just to get rid of the carpet altogether. This is actually recommended by multiple allergy-focused organizations including the American Lung Association2. ‍ Opting for hardwood floors instead can save the allergy sufferer a lot of sneezing. Particles in your air will still settle on hardwood just like they do on carpet, but they are considerably easier to remove with a vacuum because they cannot get stuck inside the material. ‍ You can still add throw rugs to get that homey feel while minimizing allergens. Make sure to buy washing machine safe ones and simply run a load of rugs about once a week. ‍ The downside with hardwood is obviously the price, and if that's enough of a deterrent, or you just really really want carpet, you have a few options. First, always use low pile carpeting. "Low pile" simply means that the strands of material that make up the carpet are shorter. With this type of carpet, the crevices for allergens to hide in are smaller, making it harder for them to get stuck, making them easy to remove with a vacuum. Never ever ever use high pile carpeting if you have a common allergy. You will not enjoy your time with it. ‍ Weatherstripping One way that sneaky particles like pollen and bacteria can get into your home is through drafts and incomplete seals along windows and doors. Sealing off those unintentional airways with some weatherstripping is a quick and generally pretty easy way to keep those allergens out of your home. ‍ Weatherstripping's primary goal is to lower your energy bill, but cutting off sources of air pollution is a secondary benefit of this home maintenance task. Weatherstripping is especially valuable in this role to homes in places that see higher than average levels of outdoor air pollution such as Los Angeles. ‍ There are tons of different types of weatherstripping, most of which can be used in several situations and are extremely easy to install. First, you have to figure out if you have drafts and where they are. An energy audit from a professional will give you detailed descriptions of where you need to add weatherstripping. If you prefer to conduct the search yourself, there are a few ways to identify drafts. Flashlight test Moisture test Dollar bill test Smoke test ‍ There are tons of different types of weatherstripping, many of which are adhesive-backed, making their installation process as easy as sticking it to something. Others require nailing in, such as a door sweep, which protects your home from drafts coming from underneath doors. Read more about all the types of weatherstripping right here. ‍ Use a vacuum with a HEPA filter Make sure to invest in a quality vacuum that will suck up allergens from all types of flooring and keep them locked away until you clean it out. The way to do this is to purchase a vacuum that contains a HEPA filter. HEPA stands for High Efficiency Particle Arrestance—it's basically a supercharged filter. ‍ A true HEPA filter is required to catch at least 99.7% of particles larger than 0.3 microns in diameter. That's extremely tiny. ‍ You cannot use a HEPA filter in your home because it will cut off too much airflow to the HVAC unit, but that is not an issue inside a vacuum. Get a vacuum with the best filter you possibly can to ensure that it traps as many tiny allergens as possible. This will stop pollutants from recirculating into the air. ‍ Change your air filter Bar-none, the most effective way to improve your IAQ of allergens is to use a high quality air filter and change it with regularity. Like weatherstripping, this will also help lower your energy bill, but its primary function is cleaning the air. ‍ Many pollutants that infiltrate the air you breathe are so small they aren't cute anymore. No matter how many precautions you take to protect your home's air from the threats outside, some pollutants will still get inside. To get these out of your house, you need a filter you can trust to catch these pollutants. ‍ A fiberglass air filter can never be counted on to catch even medium-sized pollutants, much less small ones. These pollutants will simply recirculate through your ductwork and back into your home, where they're free to be inhaled into your lungs. The ones that don't will get caught in your HVAC system and create buildup that can lead to costly repairs or breakdown. ‍ Washable filters may get these small particles, but they'll struggle with larger ones, which there are usually more of and just as harmful to your indoor air quality. ‍ Instead, get a pleated air filter with a MERV 8 rating or higher. If you suffer from allergies, own pets, or deal with various pollution issues, upgrade to a MERV 11 or MERV 13 filter. Pollutants that get past all your initial defenses and enter the air in your home won't last long against a pleated air filter. ‍ Turns out that de-allergyifiyng (definitely a real word) your home just requires a few routine practices that you probably already do anyway. You just need to adjust how you do them slightly. Some things you can even take off your to-do list instead of adding them, such as changing your air filter. Check out Second Nature's air filters subscription service to never have to think about using the right air filter again.

Calendar icon February 6, 2023

Read more

How Your Air Conditioning Actually Works

We're simplifying this for you. It’s time for some science. And we suppose some mechanics as well. We’re talking about your heating, ventilation, and air conditioning (HVAC) system. Everybody knows what their HVAC system is and everybody knows what it does. Do you know how it works though? While it might not be the most exciting topic you can spend the next couple of minutes reading about, there’s quite a bit of value in the knowledge, especially when it comes to diagnosing issues and maintenance. ‍ Today, we’ll be focusing on the cooling process. It may still be early in the year, but you’ll be turning that thermostat down in no time. So let’s dive in before that time comes. ‍ SN Tip: “Air Conditioning,” commonly referred to A/C, is any system that controls the humidity, temperature, and airflow—it’s essentially “conditioning” you air. So when you say turn on the “A/C,” you’re not referring to making it colder. ‍ The first step in the cooling process of air conditioning involves a section of the system known as the blower. The blower blows air, hence “blower.” This fan pushes air from the rooms of your home into the second step of an air conditioning system, which is known as the evaporator. ‍ The evaporator is a collection of coils containing refrigerant liquid often known by a common brand name “Puron.” As air is pushed through the evaporator by the blower, the liquid coolant absorbs heat into the coils from the air. The heat transfer out of the air cools it down while causing the refrigerating liquid to evaporate into a gas, hence evaporator. (Not a lot of creativity was used in the naming of these things). ‍ SN Tip: The EPA’s Clean Air Act mandates that Freon production ends by January 2020. New HVAC units use the Puron refrigerant instead of Freon. As the eco-friendly option, Puron has become the standard in air conditioning. Plus, it may boost your unit’s energy efficiency. ‍ The air blows out of the evaporator and back into your living space at the desired temperature. The refrigerant liquid, now gas, moves into the part of the system that is commonly outside your home where it meets the compressor. This device compresses the coolant vapor, pressurizing it and heating it further. ‍ The hot gas then travels to the condenser, which is the fourth part of the sequence and works in the same fashion as a car radiator. The release of heat causes the gaseous refrigerant to condense back to its liquid state. ‍ The final step before the cycle begins again occurs in the expansion valve. This allows the pressurized coolant to expand, which further cools it down because of chemistry. The cool liquid then travels back into the evaporator where more air from your home is blowing through, and the whole thing starts again. ‍ And that’s how your air conditioner cools your air. It’s not an overly complicated process, but it’s important to know what you’re doing if you’re going to attempt a DIY-fix. And you can always call a professional if you’re not entirely sure what you’re doing. ‍

Calendar icon February 6, 2023

Read more

Receive articles straight to your inbox

How to Find & Fix a Draft & Air Leaks

Drafts can force your HVAC system to work harder and cost you money You can’t see it. You don’t know it’s there until you’re standing right in front of it. It sneaks into your home right under your nose and drives up your electric bill. It’s air. Well, not just any air. Specifically, we’re talking air from outside your home that sneaks in via drafts. Poor insulation is one of the most effective ways to throw away money on your monthly bills. When outdoor air enters your home in the summertime, it forces your air conditioning to work that much harder to keep your home at the desired temperature. The same is true when you’re trying to heat your home in the winter. Fortunately, there are options to fix this issue that you can do yourself. ‍ The first step in this process is to identify where your air leaks are coming from. Different places will require different tools and steps to seal correctly, so identifying your significant problem areas is a critical first step. Doors and windows are obvious places to start, but less frequented areas of your home, like your attic, may be considerable areas of concern. ‍ Knee walls, which are walls in your attic that hold up rafters, are a common location for sneaky air leaks. Most people don’t spend too much time in their attic because it’s dark and creepy and it has spiders. Thus, most people don’t know that their knee walls and other spots in their attic are a burden on their bank account every single month. Sealing them up is an excellent place to start. ‍ A lot of homes still have fiberglass batts or mats for insulation up there and swapping that old stuff out for a more effective insulating material is a must for energy-conscious folks. There are lots of different options for insulating your attic that are more effective than rolls of fiberglass. Cellulose, loose-fill fiberglass, and spray foam are all better choices to fix your attic and begin to save money. ‍ Loose-fill fiberglass and cellulose both require blowing machines to cover your attic. As loose-fill insulation, they're sold in bags of small particles that are sprayed around your attic via the blowing machine. Installing them is something of a project, but the savings are well worth the effort, and it isn’t challenging as much as it is time-consuming and uncomfortable (it can get hot up there). Spray foam, a third-quality alternative, comes in different varieties and is even more effective than the aforementioned options. It’s particularly expensive though and usually requires a professional to install properly. You can learn more about advanced attic insulation options from professionals by clicking here. ‍ Outside of the attic, electrical outlets can often be an accessory to the assault on your electric bill. This fix tends to be one of the easiest around, and you’ll be surprised at how much of a difference it can make. Gaskets specifically designed to seal electrical outlets can be purchased at your local hardware store for less than three dollars. There are different varieties, but many have an installation process as simple as taking off the plastic cover, applying the sealer or gasket to the wall, and then reinstalling the plastic cover. ‍ Once you’ve successfully installed the gaskets around your outlets, continue to monitor them for drafts. In certain circumstances, these may not be enough to secure the outlets adequately. If you’re finding that to be the case, you might need to bring out the big guns—caulking guns that is. Sealing the edges of the outlet hole with caulking or putty may be necessary to deny air any entrance entirely. Consider installing a larger plastic cover as well. Depending on how much putty is used, it may try to seep out the sides if you merely reinstall that same outlet cover you were using. ‍ Finally, It’s time to discuss the obvious perpetrator: doors and windows. You may think closing and locking your doors and windows is enough to keep outdoor air outdoors. It helps, but it’s rarely sufficient. You need something better. Weatherstripping is a good starting point. There are many different types of weatherstripping, including felt, foam, and silicone, and most can be picked up locally for relatively cheap. The use of v strip weatherstripping around the frames of doors and windows is a common practice to prevent air leaks. Like gaskets for outlets, it’s easy, cheap, and effective. ‍ Thoroughly sealing your home may seem like a lot of work for a little reward. If you do it right though, there are plenty of savings to be had.

Calendar icon February 6, 2023

Read more

How to Tell if a Window Seal is Broken & How to Fix it

Learn how to identify a broken window seal and what your best options are for dealing with it. There are a lot of home improvement projects that can be a lot of fun to do. Resealing a window is decidedly not one of them. If your home features double pane windows, it will, unfortunately, be something you will have to do at some point. Window seals will wear down over time and eventually need repair or replacement. So how do you know if your window needs repair, and how do you know what to do about it if it does? ‍ What is a double pane window? A double pane window, also known as a dual pane window or thermopane window, is simply a window with two panes of glass instead of one. If you don’t know what a pane is, it’s just the sheet of glass that fits within the window frame. Double panes have two of these. Singles only have one. ‍ Your home most likely has double pane windows. Single pane windows are out of date, and triple pane, while they do exist, are not often opted for by homeowners. Double pane is pretty much the standard at this point. ‍ Double pane windows insulate your home better than single pane, offsetting the higher initial cost with lower monthly power bills. They can do this for two reasons, the first of which is obvious. There is more material between you and the outside world than there would be with only one pane. The second reason is argon gas, which is inserted between the window panes to assist in insulation. ‍ How can I tell if my double pane window is broken? The primary indicator of a broken window seal is moisture between the window panes. If your windows are foggy, but nothing happens when you try and wipe away the condensation, the fog is inside the window. That is the immediate and obvious sign that your window seal is broken. ‍ This moisture won’t always cover the whole window in fogginess. Often, you’ll be able to spot the moisture only in the corners in the form of fog or water droplets. Still, though, this means your seal is busted and needs a fix. ‍ Unfortunately, a broken seal does mean the insulating ability of the window is diminished. Outside air is getting inside, and the argon gas that helps insulate is escaping, extending the issues of a broken window seal well beyond its appearance. ‍ What are my options? Call in the warranty Most windows come with warranties when they are purchased. Try to buy windows with the longest warranties possible, as it can save you a lot of hassle should you ever need it. If your window is still under warranty, your problem is much smaller. Call in the warranty and have the window replaced. Done and done. ‍ Replace the window entirely If your window seal goes bad, and the warranty is expired, your first option is to replace the window entirely. This will be the most expensive option, but your brand new fully insulated window will save you money long-term on your power bills. You’ll likely want to be calling in a professional for this particular repair job. A good estimate for a professional window replacement is around $500 if you have a more common vinyl window. Replacing a wood frame window is always more expensive, sometimes costing more than $1000. ‍ Fix the seal If you don’t want to replace the entire window, there are other options, one of which is having just the seal itself fixed. Keep in mind this won’t bring your window back to full insulating power, as the insulating argon gas between the panes won’t be replaced. However, it will be considerably less expensive than replacing the whole window. Still, the decreased insulation will start to even the cost over time. ‍ Repairing a window seal could mean a few different things depending on where the seal is broken and how much of it is broken, but a fair estimate for the cost of a professional window seal repair is around $100. ‍ Leave the window the way it is If you find the seal break isn’t significant and is not resulting in material increases of your power bill or the fogging up of the window, you could leave it as-is. ‍ This is not recommended because the seal is only going to deteriorate more if left on its own. If you identify the busted seal but choose to do nothing because it isn’t currently an issue, it will likely become an issue down the road, so you might as well take care of it. ‍ Those of you that live in a more mild climate may find this to be a more appealing option. ‍ Defogging Defogging is a relatively new technique that is designed to fix the physical appearance of a window with a broken seal. This will do virtually nothing to correct the insulation problems but could be useful as a short-term solution if you need to fix the appearance of your window. ‍ A professional defogging service can conduct this for you. This involves drilling a tiny hole in the window pane and removing all the condensation between both. Next, an anti-fog solution is pumped into the window and the hole is sealed. This will, at least temporarily, restore the appearance of your window. The seal breakage still exists, though, so eventually, the window will fog back up. ‍ Is there a DIY option? Technically, you can replace a window on your own, but it’s by no means quick and easy. You’ll need a lot of tools and several hours to complete a window reinstallation, and it is generally recommended against doing so yourself unless you have the appropriate skillset. If you’re determined to do it yourself, the first step is examing the frame and deciding what shape it is in. You can use insert windows if your frame is in good shape, which just means a sticking a new window into an old frame. This is considerably easier than what is necessary if you need to replace the frame. Stripping out the entire frame and replacing the whole unit is a serious task that you can also do yourself. Just make sure you know what you are doing.

Calendar icon February 6, 2023

Read more

What is HVAC & What Does it Mean?

HVAC stands for Heating, Ventilation, and Air Conditioning. Whether it’s the dead of winter and the elements are as harsh as your mother-in-law’s criticism or you’re a walking puddle in the middle of August, a home’s HVAC system is what ensures your family is provided with a temperate, pleasant refuge from the great outdoors. Your HVAC system is critical to the comfort your home provides. HVAC stands for heating, ventilation, and air conditioning, and it simply refers to the system that heats, cools, and ventilates your home. HVAC systems vary and there are various manufacturers, styles, and types. The HVAC (generally) includes the heating and cooling unit itself, lots of ductwork through the home, air returns, and air filters. ‍ Types of HVAC systems There are three main types of HVAC systems: split and window AC, packaged heating and air conditioning systems, and central AC systems. ‍ Split and window air conditioning systems Split ACs are used in larger areas than window ACs. The split AC focuses on splitting the cold from the hot side of the system. The cold side has the cold coil and the expansion valve. This is usually placed inside a furnace or any other form of air handler. The handler blows air over the coil and the cooled air is distributed to various rooms in the building through the air ducts. ‍ Window air conditioners work by fans blowing air through the coils, improving how they separate the heat and cold. Heat gets lost the outside air and is replaced with cool air for the room. ‍ Packaged heating and air conditioning systems Hence the name, this type of system is the total package, they possess both heating and cooling equipment in a single unit. Users can place them in mechanical rooms, on the rooftop or at a grade close to the conditioning space. The package AC has all the components in one unit, unlike split systems in which the cold and hot units are separate. These elements have a centrifugal fan or blower that helps distribute the air throughout the elements of the structure. ‍ Central air conditioning Most of the air conditioners in residential buildings are in the form of split systems. The compressor and condenser are combined as a single condensing unit mounted outdoors. The evaporator, a finned coil, is mounted in a section of ductwork within the furnace blower. Two flexible refrigerant lines, one for gas and one for liquid, connect the components. When the furnace is electric, a blower is included in the system. The compressor uses electricity as its source of power to pump the refrigerant across the system collecting indoor heat and removing it from the home. The heat dissipates outdoors by the coil in the condensing unit. ‍ Warm air indoors gets blown through the indoor coil (cold) to remove moisture and heat. The heat in the air transfers to the coil and thus the air cools. The water vapor condenses on the coil and collects inside a drain pan. It goes outside through the condensate drain. The heat, after flowing to the evaporator coil, pumps outdoors while the now cooled air inside the room circulates through the fan on the air handler. Thus, the indoor temperature is maintained. ‍ Give your HVAC system a big thank you When all is working as it should with an HVAC system, it is a silent soldier for the home's comfort. However, if your HVAC system has ever malfunctioned or broken in the middle of the winter or summer, it’s likely you have developed a deep love and appreciation for the essential service your HVAC system provides. So, take care of your system; baby it, even. Be sure to change your filters frequently and on a regular schedule, as well as get your system cleaned, inspected, and serviced annually!

Calendar icon February 6, 2023

Read more

Pleated Filters Won't Damage Your Airflow

Let's bust some myths about airflow and pleated air filters. A myth. An old wives' tale. A misconception. Whatever you want to call it, that’s what this is. If you have ever had an HVAC technician come to examine the heating and air conditioning systems in your home, there’s a chance you may have had the common refrain tossed your way. ‍ “Use the cheapest filters you can find. The thicker pleated ones restrict too much airflow and will starve your system.” ‍ Is this true? No, it isn’t. It is true that airflow is lessened, albeit marginally, with a pleated air filter versus a cheap fiberglass air filter, but the risks of lessened airflow, a direct result of what is known as pressure drop, are assumed, and they are assumed incorrectly. ‍ What’s really happening? ‍ Myth one: Pleated filters will blow out your fan motor It’s worth noting that nobody specifies what they mean by “blow out” or “break down.” You may have heard the phrase “starve your unit of air.” The implication is that by reducing the amount of airflow into your HVAC system, the motor that powers the fan will overwork trying to move air and it will burn out, almost like a car red-lining for too long before the engine explodes. The result is a catastrophic failure that occurs in one instant. This is absolutely not true. ‍ There is no mechanical connection between a fan motor and an air filter. The fan is going to do the same thing, regardless of how much airflow is being allowed by your filter. Unless you have what is known as an ECM motor, your fan is going to move at the same speed and consume the same amount of power regardless of how significant the pressure drop is. The motor does not know what the airflow levels are, nor does it have any way to adjust its workload for such a thing. Thus, it's not going to "work harder." ‍ ECM motors are more advanced motors that electronically adjust their speed to account for airflow levels. They will increase power as necessary to move air. ECM motors are more efficient and longer-lasting as they do not use power that they do not need. ‍ You may have heard a technician tell you that the fan motor draws more power with less airflow. This is also false. Ironically, it's the exact opposite. Recall that, unless you're using an ECM, your fan motor has no capacity to say "we need more power." It's off or it's on. So with less airflow, the fan is actually moving less air, which requires less energy, so the machine draws less power to keep it running at the same level. It seems counterintuitive at first, but makes quite a bit of sense when you think about it. Note that this does not mean bad airflow is actually good. You still want a low pressure drop, but this increased power usage is a myth. ‍ What will happen in situations where your pressure drop is too high is the fan will need to run longer in order to achieve the desired temperature in the home because it is cooling or heating less air at a time. As with anything, parts will wear with run time, so the risk with significantly decreased airflow is more about decreasing lifespan by increasing use, not some explosive disaster. This leads us perfectly into myth two. ‍ Myth two: Pleated air filters reduce the lifespan of your HVAC system So we’ve established that installing a pleated filter is not going to cause these catastrophic failures that many spout off about in totally healthy HVAC systems. But it’s true that they do have a higher pressure drop, thus allow less airflow, than cheaper fiberglass filters. So won’t they shorten the lifespan of your unit? ‍ Well, no, not really. Again, the common refrain is that pleated air filters will restrict airflow, but specifics regarding what impact that will have, and how significant it is, are usually left out. We’re not going to leave those out. ‍ We conducted a study in our lab to specifically test airflow differences between a pleated and fiberglass filters, and how those differences would affect lifespan. The results were interesting. ‍ We found that with a MERV 13 pleated filter, which has a pressure drop about 2.5x that of a fiberglass filter, the system would need to run about 3.5% longer to achieve the desired temperature. Assuming an eight-year lifespan for your HVAC system, with identical usage and no external factors (that part is important), you would need to replace the fan motor in your HVAC system about 3 months earlier with a pleated filter than with a fiberglass filter. Another way to look at that is that a system that lasts 96 months with a fiberglass filter would last about 93 months with a pleated filter, a difference that is virtually negligible, and again, does not account for other factors that contribute to wear. ‍ Now, time for another important part. We mentioned the test occurred with no external factors in totally identical scenarios. You’re not going to have this in the real world. Mechanical systems like your HVAC unit will have some natural variance in lifespan, and there are other factors impacting the longevity of your equipment that will outweigh the difference the filter type alone makes, leaving the aforementioned difference in lifespan immaterial. ‍ The test only accounts for airflow. It doesn’t account for risks to your system that result from small particle buildup on your AC coils, which are higher with cheaper filters that catch less. This situation can also shorten the lifespan of your unit by requiring more use of the system, as heat is absorbed less efficiently because of the film of particles forming around the coils. ‍ “Freezing up” refers to condensation around your coils freezing as a result of the refrigerant becoming too cold. It does not mean the refrigerant itself is freezing. Modern refrigerant will freeze at -251 degrees Fahrenheit or below. If it reaches that temperature, you likely have other concerns, such as the impending Ice Age. ‍ We also conducted a study with current customers of Second Nature, determining how often participants needed to call HVAC technicians for issues both before and after starting Second Nature.` Because Second Nature helps homeowners ensure they are changing their filters on time, and the boogey man stuff around pleated air filters has proven to be largely nonsense, customers see their HVAC issues decline when participating in the service. ‍ So why do these myths persist? Simple question, simple answer. It used to be that way. The components of an HVAC system have improved in construction and durability over time, while the construction of pleated air filters has improved to maintain high levels of filtration while minimizing pressure drop. ‍ In short, pleated filters have innovated the way the fibers are woven, as well as what they are made of, to increase filtering ability while decreasing the density of the weave. Modern-day pleated air filters have relatively low pressure drops as a result, and are not going to cause significantly shortened lifespans unless you never remember to change it. ‍ Many HVAC technicians who are veterans of the trade learned their craft before these innovations, back when a pleated filter could more significantly reduce the lifespan of your unit. Thus the myths persist because they used to be more true than they are today and ever will be again. ‍ Another reason is that HVAC issues caused by a clogged air filter are incorrectly attributed to the filter, not the failure to change it. One-inch pleated filters should be changed at least every three months, and four or more inch pleated filters should be changed about every six months. If you leave a pleated air filter in your air return for two years, it will clog with pollutants and eventually reduce airflow to zero. Shortened lifespans that result from this are avoided by changing your filter on time, not by using a cheaper filter. A pleated air filter that is changed on the appropriate interval is not going to create these airflow issues. ‍ Do you want to use quality air filters, but you find yourself forgetting to change them? No worries. Our subscription service makes it impossible to forget.

Calendar icon February 6, 2023

Read more

How To Manage Your Dust Mite Allergy

Learn how to fight off these pests in your home. Dust mites are one of the leading triggers for both asthma and allergies. According to Mayo Clinic, “Dust mite allergy is an allergic reaction to tiny bugs that commonly live in house dust. Signs of dust mite allergy include sneezing and runny nose. Many people with dust mite allergy also experience signs of asthma, such as wheezing and difficulty breathing.” ‍ While it’s easy to pinpoint a seasonal allergen such as pollen, it is more difficult to identify a dust mite allergy, since everyone is routinely exposed to a certain degree of dust mites. The Asthma and Allergy Foundation of America explains how to identify a dust mite allergy: “Any time you have an asthma (or allergy) episode, think about where you were and what you were doing. Answer questions like: Was I making a bed or vacuuming?” If so, dust mites may well be causing it, because they are regularly found in pillows, mattresses, carpets, and upholstered furniture. ‍ Talk to your doctor Talking to a doctor is an essential step in identifying a dust mite allergy. The Asthma and Allergy Foundation states, “If you are allergic to dust mites, you should put an airtight cover around your pillow and mattress.” ‍ Mayo Clinic adds, “If you suspect that you may have a dust mite allergy, take steps to reduce house dust, particularly in your bedroom. Keep your bedroom clean, remove dust-collecting clutter and wash bedding in hot water that is at least 130 F (54.4 C).” Mayo Clinic also recommends choosing a high-efficiency air filter to remove dust from the air: “Look for a filter with a Minimum Efficiency Reporting Value (MERV) of 11 or 12 and leave the fan on to create a whole house air filter. Be sure to change the filter every three months.” Changing air filters regularly removes up to 95% of dust mites from indoor air. ‍ Here are some other ways to reduce dust mites: Keep indoor humidity below 50%. A hygrometer (available at hardware stores) can measure humidity level. Use a dehumidifier if needed. Vacuum regularly. Although vacuuming carpet and upholstered furniture can remove surface dust, it’s necessary to use a vacuum cleaner with a high-efficiency particulate air (HEPA) filter to remove dust mites. Dust thoroughly. Use a damp or oiled mop or rag to clean up dust from surface areas. This keeps dust from becoming airborne. Install a high-efficiency air filter in your heating/air conditioning system to filter particulates out of the air. Remove dust mite-prone household items. Carpet is notorious for harboring dust mites. If possible, replace carpet with tile, wood, or vinyl flooring, and get rid of upholstered furniture and non-washable curtains. be surprised to learn what the actual number one concern is with chlorine.

Calendar icon February 6, 2023

Read more

Smoke Pollution Relief Effort by FilterEasy

Read about our smoke pollution relief effort. This year’s wildfire season, which has been one of the worst on record, has forced residents of many western states to cope with serious air quality issues. Smoke pollution, which can be carried thousands of miles by the wind, has spread across the West Coast from its origin to neighboring states, profoundly affecting residents in Washington, Oregon, and California. The result has been an air quality crisis that has reached hazardous levels and left many without clean air to breathe, whether inside or outside their home. Today, we're announcing Smoke Pollution Relief by FilterEasy. Starting in Washington and expanding to California and Oregon, FilterEasy is reaching out to those affected and doing what we can to help with the air quality crisis. We’re donating thousands of 20"x20" smoke-filtering air filters to communities in need—those that have taken on the brunt of the smoke pollution crisis. These smoke-filtering air filters can be turned into do-it-yourself Air Purifiers with any standard box fan. The use of a smoke-filtering air filter is proven to decrease smoke pollution in your home by as much as 80–90%. This fancy graph details the exact decrease in indoor pollution with use. There’s no denying the effectiveness. To start, we’re partnering with Seattle-based organization Front and Centered to ensure these filters can get to those who need them. As our on-the-ground agent of change, they'll be able to manage allocation and distribution of air filters across Washington. “Smoke pollution from forest fires is a real public health issue in Washington right now. Even though the air has cleared for many, the communities we work with have severe air quality issues year round. With smoke-filtering air filters, we can help those in need get cleaner indoor air.” - David Mendoza, Front and Centered Want to help? You can help those on the west coast breathe cleaner air by donating now. Beyond that, we ask that you share it. Let's make this viral! We're proud that FilterEasy can help play a part in helping provide aid to those afflicted by poor air quality. Together, we can make a difference. Because everyone deserves clean air.

Calendar icon February 6, 2023

Read more

Everything You Need to Know About Whole House Air Filters

Why do I need such a big air filter? There may not be a single product on earth less standardized than the home air filter. It’s the reason why nobody can ever find their size at the hardware store and the reason why we carry more than 66,000 sizes. ‍ One type that can be particularly difficult to locate in the local store is the whole house filter. These are very different than the more common one-inch filters. You may have heard them called whole house air purifiers, which is a misnomer. An air purifier is an addition to your HVAC system, not part of it. Although air filters do indeed clean the air, they are part of your system and not optional. Now that we've clarified that, let’s get back to it. ‍ As the name implies, the concept is defined by the need for only one filter per home. This is the most common setup, but it’s not always true in practice. You’ll need as many whole house filters as you have air handlers, which may vary depending on how your HVAC system is configured. ‍ An air handler (or AHU for Air Handler Unit) is a device used to regulate and circulate air. It literally “handles” your air. Some homes may have more than one air handler to regulate temperatures in different areas separately. ‍ What does it look like? Any filter three inches or thicker is designed to be a whole house filter. The most common thicknesses are four and five inches, while three- and six-inch varieties do exist. They feature the same construction as the common one-inch pleated filters with one distinction. Whole house filters offer significantly more surface area than one-inch filters because of the deep-v pleats that fill its nearly half-foot thick frame. ‍ With all filters, the “nominal size” of an air filter means the rounded size, where each dimension is rounded up or down to a whole number. There’s a standard undercut on one-inch filters, meaning that all one-inch filters measure ¼” to ½” smaller than their nominal size, but there is not a standard undercut on whole house filters. This means that two 25x20x5 filters may actually be different sizes entirely if they are made by different brands. Know the exact size you need, or you might end up with a whole house filter that doesn’t fit. ‍ With Second Nature, you can select your whole house filter by brand, so you know you’re getting exactly the right size every time. How does it differ? Besides its physical appearance, the primary difference between a whole house filter and a regular one-inch filter is the longevity. Because of its massive surface area, a whole house filter doesn’t need to be changed nearly as often. A replacement is typically required every six months instead of three, and in some cases, a change isn’t needed more often than once a year. Like any filter, the frequency of replacement is determined by what factors contribute to your air quality. Normal living situation with no pets? Six months will do. Lots of pets and live in a polluted area? Probably need to be changed more frequently, like every three to four months. Live in Fiji? Could probably stretch the lifespan of that filter. ‍ The difference in construction and longevity does not fundamentally alter the effectiveness of the filter at catching pollutants. Whole house filters still come in standard filtrating ratings (like MERV 8, 11, and 13) and filter similar types and percentages of particles. ‍ Does it cost more? Yes. A whole house filter is on average priced somewhere between about $25 and $35, with some pushing into the $40 range. While they’re more expensive than one-inch air filters, you also change them less frequently and usually only have one at a time. Even though a whole house air filter may cost up to four times as much as its smaller cousins, you could end up spending less on air filters per year (depending on your house and living situation). ‍ Where does it go? A whole house filter does not go in your wall like other air filters. These filters go into the ductwork directly in front of your HVAC unit. Some varieties have a housing or cartridge that they fit in before being installed while others are inserted directly into a slot in the duct. ‍ Should I get a whole house filter? Well, it’s not really up to you. Your house has what your house has. If you bought a home that uses a whole house air filter, then yes. If you bought one that doesn’t...well, you get the point. ‍ Hopefully, this clears up any questions regarding the mysterious whole house filter you may have. Feel free to reach out to us on Facebook if you have any more.

Calendar icon February 6, 2023

Read more

How To Reduce Asthma Triggers And Indoor Allergens

Indoor air quality is even more important for those with asthma. Use MERV 11 or Higher Grade Filters and Replace Them RegularlyStudies show that HVAC filtration is the most effective way to control airborne allergens. As opposed to all other methods, central air filtration improves the quality of air in the entire home, rather than in just a localized area. Experts, including the American Lung Association Health House, recommend using a filter with a MERV rating of 11 or higher. Filters should be changed at least every 3 months. Old filters can become a reservoir for contamination and can do more harm than good. Avoid washable filters. If these are put back damp, they can grow dangerous mold and fungal spores. Mattress Covers and Hypoallergenic Bedding Hypo-allergenic mattress and pillow covers provide protection from allergens like dust mites, pet dander, mold spores and pollen. Avoid feather and down pillows and comforters, as these are common allergens. Hypoallergenic synthetic materials, such as polyester, are good substitutes. Remove Carpeting from BedroomsCarpets and rugs trap allergens, especially dust mites and pollen. Experts warn against carpet, specifically in bedrooms, where prolonged exposure occurs for several hours every night. Steam clean carpets, especially in bedrooms, on a regular basis. If possible, replace carpet with hard flooring such as wood or vinyl. Pet CareUnfortunately, pets and their dander are a common allergen that can cause asthma attacks. Check out our guide to reducing pet dander to cut back the asthma triggers caused by your pet(s). Portable Air Cleaners A portable HEPA air cleaner will improve air quality in the room it is placed, but will not improve overall household air quality. Therefore, bedrooms are the best places to put these units, where they will provide relief throughout the evening. One study shows that placing several air cleaners around a home lead to an overall higher level of household air quality. Portable air cleaners act in addition to, but are not a substitute for HVAC filters. Ionic air cleaners remove particulate matter (PM) from the air, but also release ozone, which is a lung irritant that can cause adverse health symptoms. HEPA air filters have been shown to be more effective for dog and cat allergies, than for dust-mite and mold allergies.

Calendar icon February 6, 2023

Read more

Easy Ways to Defeat Your Dust Mite Allergy

Dust mites don't bite but they can cause other problems. What’s the grossest bug you can think of? Cockroach? Nope. Centipede? Nope. Spider? Well yes, but there’s a different one that we’re thinking of: the dust mite. ‍ What do dust mites look like? These things are ugly. They’re nasty and kind of look like something from out of a horror movie. They’re also everywhere, including your home, your carpet, your bed, and even your face. ‍ Okay, we didn’t mean to scare you there. The dust mite may be everywhere, but it’s almost completely harmless and pretty normal to have around. The concern with dust mites doesn’t come from the bugs themselves. Dust mites cannot and do not bite. They are not parasites. The bugs themselves can’t do direct harm. The concern with these tiny little nasty looking things is the allergens they produce, resulting in dust mite allergies. ‍ That’s why, in today’s blog post, we’re going to talk about how to help with a dust mite allergy, answer common questions like “Does baking soda kill dust mites?” and more. First off, what are dust mites? ‍ What are dust mites and what do dust mites look like? This close up of a dust mite shows just how gross they really are. A dust mite is a microscopic pest that kind of looks like an insect but is technically not one. They look a lot like a teeny tiny cockroach, and they don’t have a face, which makes them more or less ugly depending on what you think of bug faces. You can’t see a dust mite with the naked eye, as adult ones are only about five micrometers long. That’s about the size of your average bacterium. ‍ Dust mites feed primarily on gross stuff like dander and skin cells, thus are frequently found in places where that stuff builds up like mattresses, couches, and linens. As most homes have these things, the vast majority of houses would have a detectable dust mite presence if tested. ‍ Dust mites can be tested for by collecting some dust and looking at it under a microscope. ‍ Where do dust mites live? As stated, dust mites love fabrics and places where dead skin cells collect. They’re big fans of dander and flakes of skin and prefer to eat that. Mattresses are often their go-to hideout as humans probably shed more skin cells there than anywhere else. Carpets, couches soft chairs, rugs, and curtains are also prime dust mite habitat. ‍ Humidity is an essential factor in your home’s ability to house and breed dust mites. These creatures don’t drink water, but instead, absorb it from the air around them. Because of this, they can become dehydrated and die in environments where the humidity levels are too low. ‍ Optimum conditions for growth and development are around 75-80 degrees F and 70-80 percent relative humidity. House dust mites absorb and lose moisture through their skin, and are very vulnerable to dehydration. Consequently, humidity levels within the home have a significant effect on survival. Dust mites cannot survive well at relative humidities below 50 percent. (Source: University of Kentucky Entomology Dept ) ‍ What are dust mite allergies? Dust mite allergies are a little like pet allergies in the sense that it isn’t the creature itself that you are allergic to, but rather a protein that it releases. These proteins are released from the mites when they shed skin and expel waste. ‍ These allergens build up on soft surfaces and can be sent in the air easily by the shaking out of sheets, lifting of couch cushions, or walking on carpets. Next thing you know, lots of allergens are populating your air. ‍ Dust mite allergies also don’t have a particular season, so symptoms happen year round. This is unfortunate for the more than 25 million Americans who have asthma, as dust mite allergies are prevalent among asthmatics and are often identified as the root cause of its development. ‍ Symptoms of dust mite allergies Sneezing Runny nose Itchy eyes Congestion Cough Can trigger an asthma attack ‍ How do you treat dust mite allergies? Want to know how to reduce a dust mite allergy? The most successful approach to treating dust mite allergies is to remove the things from your home that dust mites require to survive. This can be done with a couple of easy steps, which we’ll break down right here. ‍ First, it’s essential to understand that you’re never getting rid of all dust mites. There is always going to be some dust mites lumbering about in your home. You can, however, significantly reduce the number of them and make your home much healthier with some simple and routine items. ‍ Decrease the humidity Humidity is a vital environmental element for dust mites. They need a high level of humidity to survive, so stripping them of that is an effective way to make your home environment non-conducive to dust mites. ‍ A dehumidifier is the best way to do this. This home appliance does exactly what it sounds like: decrease the humidity. These devices work by pulling air into them like an air conditioner and then using a refrigerant to condense water vapor in the air into water droplets. The droplets then fall into a pan or reservoir that you empty when it's full. Quite simply, it pulls the water out of your air. ‍ Dehumidifiers come in a variety of sizes and a range of prices. The smallest is the portable kind, which works well for individual rooms like a bathroom or closet, and they start at only around $20. Larger dehumidifiers that work for entire areas of your home will cost into the hundreds, and whole-house models even exist that cost four digits. ‍ High humidity in the home contributes to the presence of more allergens than just dust mites. Molds and other fungi love humid environments. So a dehumidifier is an excellent way to tackle multiple different allergens and is how to help with a dust mite allergy. ‍ If you live in a southeastern state, where the air is made of soup during the summer, congratulations. You’re more vulnerable to dust mites in your home than most other places. Remove carpeting if possible. Another effective way to make your home a less appealing environment for dust mites is to remove as many soft surfaces as possible. Soft surfaces, like carpets, are predisposed to dust mites because of how well they hold pollutants like dust and skin cells. Removing carpets altogether seems extreme, and it may be in many cases. However, if you have severe dust mite allergies, it may be necessary. ‍ Hardwood floors will still accumulate allergens and allergy attractors like dust and skin cells on them. They’re much easier to clean though, and particles don’t get stuck inside them. ‍ If you elect to stick with carpet, be sure to get low-pile carpet. It is easier to clean and has less capacity for holding dust and particles. High-pile carpeting is pretty much an allergy-sufferers worst nightmare, so stay away from that. ‍ Vacuum and dust often. Routine cleaning of the surfaces in your home is an absolute must for dust mite allergy sufferers. Allergens that dust mites produce can settle quickly into dust and get suspended in the air with the dust particles. Dusting with a damp cloth or paper towel will help collect these allergens with the dust particles. You should dust at least once a week. ‍ Regardless of whether you have carpet or hardwood, include weekly vacuuming with your weekly dusting to remove allergens from your home. A vacuum designed to take on pet hair works well, as dander is often released with pet hair and is a primary attractor of dust mites. These vacuums typically come with a HEPA filter to trap small allergens like pet dander. A HEPA filter vacuum is critical for dust mite allergy sufferers because dust mite allergens are also quite small and could blow back into your home without said filter. ‍ Wash mattresses and sheets even more often. In addition to vacuuming and dusting your home’s surfaces, washing your bed sheets and covers at least once a week is an easy and effective countermeasure in the fight against dust mites. As mentioned above, mattresses and things on mattresses are spot number one for dust mites. You spend more time in your bed than any other place in your home, so naturally, this is where most of the dead skin will accumulate. ‍ Humidity is naturally increased on your mattress because you perspire when you sleep, adding to the attractiveness of the mattress to the dust mite. ‍ Wash your sheets, covers, and pillowcases at least once a week and make sure to wash in hot water. If hot water isn’t an option, you can opt for allergen-targeting laundry detergent. These detergents use an additive called ACARIL to specifically target allergens like dust mites and the things they eat. ‍ It’s pretty important to clean your mattress regularly too, as washing your linens only tackles part of the problem. If you’re wondering “Does baking soda kill dust mites?” the answer is yes! Baking soda is a pretty potent weapon against dust mites in your bed. Using it is a simple process as well. Add a little bit of essential oil to the baking soda and then spread it across the top of your mattress, then vacuum. This is a proven way to help rid your mattress of a dust mite infestation. ‍ Use of essential oils can help to kill the dust mites before the vacuuming begins. ‍ Use at least a MERV 8 pleated air filter. While Allergens produced by dust mites may not stay suspended in the air as long as other allergens, they can still enter the air very easily. Sitting down on a couch, falling onto your bed, or lifting your sheets to make your bed can send dust mite droppings and other allergenic mite products into the air you breathe. This creates a situation ripe for an allergic reaction. ‍ If you’re using a low-quality air filter, it might not catch these allergens, which allows them to cycle back into your home and the air you breath. Using a pleated air filter of at least a MERV rating of 8 will help to eliminate dust mite allergens from your home that are floating in the air. ‍ Take medication. If you find that eliminating the environment for dust mites isn’t working as well as you’d like, over-the-counter allergy medications like antihistamines and decongestants can treat your symptoms. These are usually inexpensive and available at about any grocery store or general store. ‍ Dust mites are pretty nasty, and the allergens they produce can be a real problem in your home. But now you know our proven tips for how to reduce a dust mite allergy. Luckily, with the right routine cleaning practices, you can make your home a much less appealing environment for these microscopic pests and a much more appealing environment for you and your family.

Calendar icon February 6, 2023

Read more

How to Survive Spring Pollen Allergies

Five easy steps to help manage your allergies this spring. Spring will be here sooner than you think, and with it will come a host of things we love and a handful of things we don’t. One of those things we wish we could do without is pollen. We’re talking about that awful yellow dust that coats everything in sight this time of year and forces the allergy-afflicted among us to stay inside. ‍ Pollen is a necessary evil. It’s a critical ingredient in plant reproduction and as a result essential to life itself. For some though, it’s the worst—just the worst. More than 24 million people in the United States deal with pollen allergies every spring. ‍ So what is this yellow dust of death? Pollen is an incredibly fine grain produced by the male part of a flower. Like other particulate matter, it's easily carried through the air, spread across large areas, and unfortunately inhaled. Once they enter your nose, white blood cells that defend your body against foreign invaders mistake pollen for some sort of pathogen, and a reaction begins. Say hello to allergies. ‍ Allergic reactions come with all too familiar symptoms, such as itchy and watery eyes, excessive sneezing, congestion, and a runny nose. If you experience these symptoms every spring, congratulations. You have a pollen allergy. The good news is you have come to the right place if you’re interested in how to deal with that allergy. ‍ Step 1: Know your allergies When we talk about pollen, we’re primarily talking about tree pollen. This is the most recognizable type of pollen and also the prominent culprit of allergy attacks in the spring. Grass pollens are prevalent in the summer though, and ragweed is a serious allergy concern into the fall. The first step to dealing with allergies is knowing what you're allergic to and understanding how it affects you. ‍ Step 2: Learn how to check pollen counts Pollen count measures the amount of pollen present in the air per cubic meter, either in the unit of grams or individual grains. It’s a data point that can be found on your local weather station’s daily weather report or any website that does weather “stuff.” When it approaches 10 grams per cubic meter, pollen concentration is high. ‍ The 12-point scale rates the intensity of pollen, with 12 being the highest and 0 the lowest. Low: 0-2.4 Low-medium: 2.5-4.8 Medium: 4.9-7.2 Medium-high: 7.3-9.6 High: 9.7-12 ‍ Step 3: Know your climate Allergy forecasts for spring are heavily influenced by both the pre-spring weather patterns and the region in which you live.You can typically read allergy forecasts in the same place you would find pollen counts. You can also read one right here. ‍ Allergy forecasts are usually developed by an analysis of the past weather patterns. A lot of weather-related factors are considered, but some key ones to keep an eye are rainfall and temperature. Heavy rainfall that precedes the turn of the season can be a stimulant for pollen growth. If your home state features incredible amounts of rain throughout February and early March, pollen in your climate can appear of nowhere in full force. ‍ Because of this, you might think you’d be better off in a dryer climate as an allergy sufferer, but places that get little rain usually end up being worse. Why? Well, rainfall during the pollen season can provide a temporary reprieve for allergy sufferers, as the rain washes away pollen that’s both floating through the air and on the ground. Consistent spring rains do a lot to diminish the harshness of pollen allergies, so places that lack that tend to have higher pollen counts. ‍ The effect of spring rain is an excellent example of why it is essential to know your allergies. Tree pollen may get washed away by spring rains, but those rains will stimulate grass growth in the summer, leading to higher levels of grass pollen. ‍ Windier climates also tend to be worse, as the wind keeps more pollen in the air instead of allowing it to settle. ‍ Step 4: Acquire Medicine It’s a good idea to have some allergy medicine on hand during allergy season if you suffer from allergies. Duh. Most allergy medicines can be purchased over the counter and don’t cost more than about $15. You can take a lot of steps to avoid contact with pollen, but ultimately full avoidance of the itchy-eye instigator is not practical. Having something with you to help deal with the symptoms that will inevitably arise is always part of a good plan for dealing with pollen. ‍ The official recommendations for medication include antihistamines. Your body produces histamines in response to interaction with allergens. They are the ultimate cause of the symptoms that have become synonymous with allergic reactions. Antihistamines, as the name self-defines, block or reduce these substances, slow down, and alleviate (to some degree) symptoms that make allergies so intolerable. ‍ You could also consider decongestants, depending on which symptoms you experience the most often. These reduce the swelling in blood vessels, which causes congestion in the nose, sinuses, and chest, all of which can be symptoms of allergies. ‍ Step 5: If it comes to it, stay inside When pollen counts are exceedingly high, and your allergic reactions are severe, just stay inside. It really sucks to be on house arrest during the first beautiful days of the year, but being inside is still better than sneezing, coughing, and rubbing your eyes all day. ‍ If you're inside, be sure to replace your air filters regularly with ones that help reduce allergens. Even inside your home, it's next to impossible to escape the perils of outdoor allergies. And don't even get us started on indoor air quality. ‍ Spring is allergy season, and pollen is a large part of that. Suffering from a pollen allergy is a pretty significant deterrent from enjoying the first warm weather of the year. With the right approach though, you can manage it enough to still enjoy the outdoors and the first wave of nice weather.

Calendar icon February 6, 2023

Read more

How to Get Mold out of Carpet

Removing mold from your carpet can be a tough task. Let us simplify it for you. Your home is your haven, and you are proud of your constant dedication to keeping it clean. You have a checklist and a go-to cleaning solution for everything. But what do you do after you have been hit with a leaky ceiling or a plumbing issue, and all of a sudden you discover a stain on your carpet that you hadn't noticed before? ‍ Mold growing in your home can easily go undetected. Knowing what triggers mold growth and what steps you can take to prevent it is something every homeowner should know. Removing mold from easily accessible areas like counters or bathrooms may only take a simple cleaning spray, but eliminating mold from a multilayered surface such as carpet requires a more thorough, deep clean. To understand how to remove mold, you first need to understand what mold is and how it develops. How Problematic Can Mold Be On Your Health How Does Mold Grow On Carpet Steps To Remove Mold From Carpet Steps To Prevent Mold Forming In Carpet How Problematic Can Mold Be On Your Health? Mold spores are tiny structures naturally found in the air. They are attracted to and rely on moist conditions to thrive. They also have no problem finding their way into your home. They can travel through doors, windows, heating and cooling systems, or even hitch a ride on your clothes or pets. Once they have found a conducive environment, such as your carpet, and have combined with the dust in your home, the perfect condition has been created for mold to grow. ‍ Mold spores will exist in your home air in some capacity. They’re everywhere and not really harmful at low levels. The key to successfully "managing" mold spores is keeping it from collecting in large numbers. (That's when you actually get a mold problem.) To do this, one must deprive the spores of moisture, cellulose, and time. ‍ When left untreated, mold can impact your health in several ways. According to the EPA, it releases allergens and can even release toxic substances, called Mycotoxins. If touched or inhaled, it can result in throat, skin, and eye irritation, as well as coughing and a stuffy nose. In more severe cases, when coupled with a weakened immune system, mold inhalation can even cause respiratory infections or bronchitis, as well as exacerbate symptoms in asthma sufferers. ‍ How Does Mold Grow On Carpet? Carpet is the perfect environment to trap and hide mold. This is especially true in especially wet areas such as your bathroom or basement. The thick, woven material, along with the carpet's backing, can easily absorb and retain moisture for an excessive amount of time. Carpet offers a complex structure comprised of many cellulose-based products. Wet carpet is mold’s dreamworld, so if it becomes moist, it creates that perfect environment needed for mold growth. Mold spores landing on the carpet use the moisture and cellulose to begin their germination process and are well on their path to becoming mold. Leaks, flooding, or even carpet that was cleaned but not thoroughly dried can result in mold growth. ‍ Although mold only takes a couple of days to grow, it may take up to three weeks to become visible and may not even reach the carpet's surface. Mold is likely to develop and fester under the carpet's surface, making it undetectable. Oftentimes, once it has become visible, it has reached a point of severity where the carpet is no longer salvageable. Eventually, mold left untreated can even end up damaging the baseboards beneath your carpet. Although catching mold before it has become visible is difficult, it is not impossible. If you notice your carpet is damp, or that a musty smell has developed, it may be time to unveil a portion of your carpet and do some further investigation. Any case of discoloration or odor on your carpet's surface that seems to be mildew-like might be a sign that mold is present. It is crucial that any moisture detected on your carpet is addressed within 24 to 48 hours before it has a chance to fully develop into mold. ‍ Steps To Remove Mold From Carpet. Once you have diagnosed your carpet with mold, it is essential you act immediately. Be sure to keep the area cut off from the rest of your home. Mold can quickly and easily spread, turning a small issue into a significant project—and not the fun kind of project. There are two approaches to cleaning mold from your carpet. You can use natural products, or you can attack the area with stronger chemicals. Before handling any potentially moldy areas in your home, it is vitally important that you protect your face and hands. Face masks and gloves will go a long way in ensuring that the mold and cleaning chemicals do not affect your health. It is equally important to note that you should not mix cleaning solutions unless otherwise specified, as this can create toxic fumes that would be hazardous to your health. An age-old remedy to removing mold from carpet is to apply baking soda, leaving it overnight to treat the affected area, absorbing moisture and bad odors. Something as simple as baking soda is actually the best mold remover in many circumstances. Vacuum the next day and proceed to scrub with vinegar using a stiff bristle brush. A vacuum with a HEPA filter will help collect remaining mold spores, but the vacuum's filter will need to be changed before next use, or you will be at risk of spreading these spores to other areas of your house, contaminating it once again. If your vacuum does not have a HEPA filter, it is recommended to substitute this step with a broom and dustpan. The carpet then needs to be dried as quickly as possible. You can do so by ventilating the room with open windows and running your A/C. Extra fans or dehumidifiers are also helpful to expedite this drying process. Vacuums without high-grade filtration will send mold spores back into your air, leaving them free to float around and land somewhere else they find suitable to colonize. A more aggressive approach to removing mold is to use a solution made for just that. Mold-removing products, like Allersearch ADMS Anti-Allergen Spray, can be found at your local hardware store. It is essential that the excess spray is removed using a brush, discarding the mold that you scrape out into a trash bag. Using water will only increase the risk of mold returning. After scrubbing, continue to dry the carpet using the same process recommended for the natural mold removal approach. If you are cleaning mold from a rug, opt to dry the rug outside in direct sunlight for 48 hours, as this will reduce the risk of mold returning. These tips apply to all the rugs in your home that may have fallen victim to mold growth. UV rays from the sun can actually help to kill mold spores. Of course, if mold has spread to a larger than manageable area, it may be best to seek help from a professional. Although mold remediation is expensive, costing upwards of $2,000, you can be sure the affected areas will be properly treated. As important as it is to treat mold, it is equally important to determine the underlying cause of the mold's growth and to resolve that issue simultaneously. Mold due to flooding, a leak in the roof, or an unsealed crawlspace will come back if those problems are not treated immediately. ‍ Steps To Prevent Mold Forming In Carpet. Routine is key to preventing mold from forming in your carpet. Having a weekly regimen in place will help you stay proactive in the constant fight to keep your home a healthy one. Below are some tips that will keep you one step ahead of mold: Regularly use a dehumidifier in areas prone to higher humidity to help keep moisture levels from reaching a point where mold spores need to grow. Anywhere from 30% to 50% humidity is normal for the inside of your home. It is important to check humidity levels frequently as they can change throughout the day. A/C units can also help manage humidity in your home. Keep your home well ventilated by opening windows. This is an easy way to reduce moisture in your home. Vacuuming often will help keep the dust that accompanies mold at bay. Steam clean any wet areas as this will help remove any toxins found in your carpet. Do not install carpet in areas where moisture is often present. Clean rugs in bathrooms or basements often. Do your homework when installing carpet. Be sure to choose moisture resistant padding and check that it is installed correctly. Regularly replace your home air filters with ones that guarantee they filter out allergens such as dust and mold. Mold can be scary, but removing it from your home is pretty easy. Remember, as your mother always said, "A healthy home is a happy home," and "Prevention is the best medicine." And if she didn't say that, I'm sure she was still a great mom.

Calendar icon February 6, 2023

Read more

Nominal Size vs Actual Size: Nominal Size Defined

It's not as confusing as it sounds. Often times, you will find two sizes on your air filters, a "nominal" size, and an "actual" size. What are nominal sizes? Nominal size is the size you see printed on the side of your air filter. It stems from the actual size, which is rounded up to the nearest whole inch. There are hundreds of filter sizes and although manufacturers may make slight changes and offer very slight differences in their many filter sizes, the nominal size system ensures that you, the consumer, can fall back on industry standards and not have to have custom air filters made every time you need some clean air. ‍ Think of it this way: what if every brand of smartphone had a different charger? Fortunately, manufacturers have agreed to standardize their cables (for the most part) so that all modern iPhone chargers are the same and most Android chargers are the same. Thankfully, the people who built your home agreed to follow a similar practice. ‍ What are actual sizes? The actual size is just what it says: the actual size of your air filter to a very precise degree. The actual size is accurate to one eighth of one inch. So for example: ‍ A standard filter with a nominal size of 14"x14"x1" might have an actual size of 13¾" x 13¾" x ¾". ‍ This actual size would be a pain to search for, which is why the nominal measurement was created. ‍ So which one do I use? The nominal size is the only one you really need to know when you look for air filters and it is typically printed on the cardboard edge of your air filter.

Calendar icon February 6, 2023

Read more

What Is Home Wellness?

Home wellness is the active pursuit of creating and maintaining a healthy, balanced home. Keep reading for more on what that means. A lot of you likely think your home is a pretty healthy place. I wouldn’t blame you—I do too. It’s clean, right? Well, maybe not. ‍ First, we have to define what a healthy home is. Your body, just like you home, needs to be taken care of. Just like a healthy body takes some personal wellness, a healthy home requires its own wellness too—home wellness. At Second Nature, we define home wellness as the active pursuit of creating and maintaining a healthy, balanced home. ‍ We did a research study here and found that, not too much to our surprise, 99% of Americans think that a healthy home is important. Not too much to our surprise, about every 3 in 5 of Americans also think that their home isn’t as healthy as they’d like. I can understand that. We always hear or read about something more we can be doing. ‍ We also learned that there’s a strong consensus that good indoor air quality and clean water are some of the most important factors that contribute to home wellness. Given that, let’s start with air quality. Even though 61% of Americans think that outdoor pollution is worse than the air inside your home, the air inside your home could be up to 5x more polluted than the air outside. Yes, really, indoor air can be as much as five times more polluted than what’s outside. If that surprised you, I think we can all agree that maybe the “healthy home” we pride ourselves on isn’t quite as healthy as we think. ‍ Ready some more shocking data? Good. ‍ Wearing shoes inside at home. A lot of us do it (50% of Americans in fact). We think “it isn’t a big deal.” Maybe you take your shoes off inside and so does everyone else who comes to your house. Or maybe you take them off but feel rude asking guests to do the same. Wherever you fall on the barefoot-indoors spectrum, we usually think taking shoes off inside is just so your floors remain cleaner a little longer. Yes, that’s true. That was what 77% of you think. 47% think it’s more comfortable. ‍ Since your feet collectively house about 25% of the bones in your body, along with 33 joints and hundreds of muscles, tendons, and ligaments, it’s important to take care of them! Walking barefoot can actually be healthy, but for most of us, we grew up wearing shoes and now rely on them. So give it a shot, just don’t overdo it. ‍ At the same time, 36% of Americans remove their shoes indoors because they know about the air toxins they bring inside with their shoes. Things like pesticides, e. Coli, C. diff, and even feces latch onto your shoes and gladly come inside your home. That’s just gross. Do your home a favor and take off your shoes. And those guests you don’t want to be rude to? Just politely ask them to take their shoes off. It’s your house! ‍ Before we move on to water quality, we do have to talk about air filters a little bit. Not because we sell them, although we do and you should definitely have Second Nature air filters in your home. We’re going to talk about them because regularly replacing your air filters is part of home wellness. Since 33% of Americans forget this out-of-out-of-mind home maintenance task, it’s not surprising that 63% want an easier way to remember changing out their air filters them on time. (But not you. You use Second Nature for that) ‍ When it comes to keeping yourself healthy, changing your air filters on time can help reduce negative health impacts from air toxins and can even help with allergies (and can make a big difference for those who suffer from asthma, COPD, or other respiratory conditions). Want to take care of your lungs? Take care of your home! ‍ When it comes to keeping your home healthy, regularly replacing your air filters helps prevent damage to your HVAC that could otherwise happen. It also reduces your energy bill and, consequently, your carbon footprint. In fact, you can reduce the energy consumption of your HVAC system by as much as 15% by replacing your air filters. ‍ One last thing, Americans spend an average of $159 per month on self-care activities. For those between 24 and 39 years old, that monthly average goes up to $265. That’s taking care of yourself, and that’s very important. Do you know where I’m going with this? Guess how much it costs on average to have clean air filters in your home. $10 per month. Hmmm, that seems pretty reasonable for healthy air, doesn’t it? ‍ Now, on to clean water. 64% of Americans are concerned about the quality of their drinking water. So much so that 51% regularly drink bottled water at home. Bottled water isn’t too expensive, but do you know how much plastic that is? Too much! In 2017, Americans drank 13.7 billion gallons of bottled water. ‍ Don’t get me wrong, I get it. Bottled water is easy and convenient, it’s cheap, and it’s not straight tap water. However, the cost also adds up and so does the environmental impact, and filtered tap water can be of the same or better quality without all the empty bottles. ‍ 72% of Americans say filtered tap water tastes as good as bottled water, but 51% still say they drink bottled water at home. Here’s a tip: Whether you get water from the fridge or the tap, filter it yourself. ‍ There are a lot of different options to filter your water, from pitchers with filters to refrigerator water filters to filters that go right on the tap, and none are bad choices. Just make sure the filter will get the job done. The National Sanitation Foundation classifies water filters under certain standards. ‍ NSF 42 - "Filters are certified to reduce aesthetic impurities such as chlorine and taste/odor. These can be point-of-use (under the sink, water pitcher, etc.) or point-of-entry (whole house) treatment systems.” NSF 53 - "Filters are certified to reduce a contaminant with a health effect. Health effects are set in this standard as regulated by the U.S. Environmental Protection Agency (EPA) and Health Canada. Both standards 42 and 53 cover adsorption/filtration which is a process that occurs when liquid, gas or dissolved/suspended matter adheres to the surface of, or in the pores of, an adsorbent media. Carbon filters are an example of this type of product.” ‍ A filter that meets both those standards is going to be the ideal filter for your water. Clean drinking water is one of the most important elements of a healthy home, so a good water filter is not something to skip on. ‍ Home wellness is all about creating a healthy, balanced home. This includes keeping the air you breathe and the water you drink clean and free of threats to your health. At Second Nature, we strive to help you achieve home wellness with our air filter subscription service. We make keeping your air clean easy by shipping you high-quality and reliable air filters on your schedule so that you do not forget to change them and they keep filtering pollutants out of your air.

Calendar icon February 6, 2023

Read more

Does Higher MERV Rating Restrict Airflow?

How will a higher-quality filter impact the airflow to my HVAC unit. ‍ The short answer is that it can, but it's not really an issue except under extreme circumstances. Most modern HVAC systems have no problem working with higher MERV filters, which is why millions of homeowners depend on them. The primary risk with high-efficiency air filters comes from them being left unchanged for long periods of time. If you stay on top of changing your filters, It's unlikely you'll experience any filter-driven issues with your HVAC system. ‍ Try Second Nature You want to achieve a nice balance Like everything in life and nature, we want to strive for an ideal balance. In this case, you want to have your air as clean as possible without restricting the airflow to your HVAC unit and wasting energy. Some could compare the situation to the fairy tale of Goldilocks and the Three Bears. This home has less than clean air but is energy efficient, this home has fresh air, but an inefficient HVAC, and this home is just right! Although it is not that straightforward and there are other factors to consider, do not worry! We are here to help you make the best decision for your home! ‍ Get to know a filter's quality Before making any choices, one must first understand the quality of a filter. Any air filter you purchase will have a grade on it as a tool to show its quality. The most common measurement scales that you will find are MERV, MPR, and FPR. For this blog, we will be referring to the MERV (Minimum Efficiency Reporting Value) rating scale but it can easily translate to other measurement scales that you may see used. The higher the rating of the filter is, the smaller the particles that it will capture as well as the higher the percentage of particles captured. Low-efficiency filters typically lie within MERV 1-4 and high-efficiency filters are MERV 13 and beyond. The scaling of MERV is not linear; the difference between a MERV 6 and a MERV 8 is nearly double in the percentage of particles captured. Be aware that as the MERV rating increases, the filter gets more restrictive and it will take more pressure and energy to push air through. ‍ Low-efficiency filters These filters will maximize your airflow but will do very little when it comes to cleaning your air. Filters in this category can sometimes be referred to as "rock-catchers" because their job is to make sure that nothing too significant and devastating gets sucked up into the HVAC unit as the bare minimum. They will stop the large debris, but the majority of other particles will be free to enter your HVAC unit. The dust and dirt will either land somewhere in the system or circulate back into the house. Dust and dirt on critical parts of your HVAC system will increase demand on your system, which can lead to repair and maintenance bills that you’re not looking to pay. Also, particles being circulated back into your home is just plain unhealthy. These filters are certainly better than no filter at all, but that is not saying much. ‍ Ironically, the effectiveness of low-efficiency air filters increases as the filter loads up with dirt and dust. There are two problems, though. First, it takes time for the filter to be loaded enough to get a beneficial effect so that everything that gets by the filter ends up either in your system or back in your home. Second, eventually, the filter can become so dirty that the system experiences a pressure drop which can burn out the fan motor. To prevent this, you have to change the filter, which takes you right back to the first problem. For the brief time that you get a small benefit from your low-efficiency filter is far outweighed by the problems it creates. ‍ So why use them? The main reason is that some older units can only handle these filters. A couple of decades ago, filters of lower quality were nearly the only kind used for homes. Technology for HVAC units has progressed since and most modern units of the last few years should be capable of a MERV 8 filter at the least. But older units may not be capable of enough air pressure to force air through a higher efficiency filter. Trying so could cause significant issues as well as a need for repairs. ‍ Some HVAC technicians have a preference for these low-efficiency filters due to their low resistance to airflow. When these filters get dirty and need to be changed, air will still be able to flow through them and not clog as easily. Some technicians are anticipating that people will forget to change out their filters and using low-efficiency filters regularly could help minimize damage to a neglected HVAC. Filters of this category are recommended to be changed every two to four weeks, which can be challenging to maintain for some. It may be comforting to know that your overdue filter is not as bad as it could be, but it is not doing anything else for you until it is replaced. ‍ High-efficiency filters A more efficient filter will be more effective at removing particles from the air as they enter your HVAC system. They will improve the air quality in your home as well and keep your lungs happy. Since the filtration is more thorough, it will take more energy and effort from your HVAC unit to use them. How much more can vary by home and HVAC system, but with modern technology, the increase in airflow resistance that you get with a high-efficiency filter is typically marginal. This is important to note, because many homeowners believe the relationship is simply linear, meaning as filtration efficiency increases, so does resistance to airflow at the same rate. This is not accurate, though, and it's the reason why millions of homeowners use high-efficiency filters with no concern. For example, Second Nature's Essential filter is roughly 450% more effective at capturing particles than a cheapo low-efficiency fiberglass filter, but its resistance to airflow is only about 20% higher, a marginal difference. ‍ An important note with a higher MERV filter is that you need to remember to change it. A consequence of a very effective air filter is the speed with which it can load with pollutants and begin to increase pressure drop. This is just fancy talk for "the filter catches more stuff so it clogs faster." If you leave a clogged filter unchanged for a long time, that's when you can start to see issues with resistance to airflow. This is, of course, a very easy issue to prevent. Just remember to change the filter and you're good to go. In summary So which filter should you consider? If your unit is older and/or very sensitive with airflow, use a filter that ranks from MERV 1 up to possibly MERV 6. If you want your air to at least be cleaned and handle dust, mold, pollen, and bacteria, then a MERV 8 will do the job. Having pets would require a MERV 10 to manage their dander, which tends to have smaller particles than the pollutants previously discussed. Air filters that are MERV 13 and higher are recommended for those that prioritize air quality and may have to handle asthma, severe allergies, and other similar circumstances. Try to not go beyond what you need for your situation. Otherwise, it would be a waste of energy, money, and give unneeded stress to your HVAC system. The factors of every home can vary, so you can always contact a local HVAC technician if you are ever unsure and want a second opinion. ‍ The cost-benefit equation is simple: For a few extra dollars, you can ensure that your HVAC system is as clean as possible and the air in your home is effectively filtered just by using an efficient air filter that is changed regularly. It's an easy task that Second Nature makes even easier.

Calendar icon February 6, 2023

Read more