What to Include in Your Rental Listing Description: Examples & Template
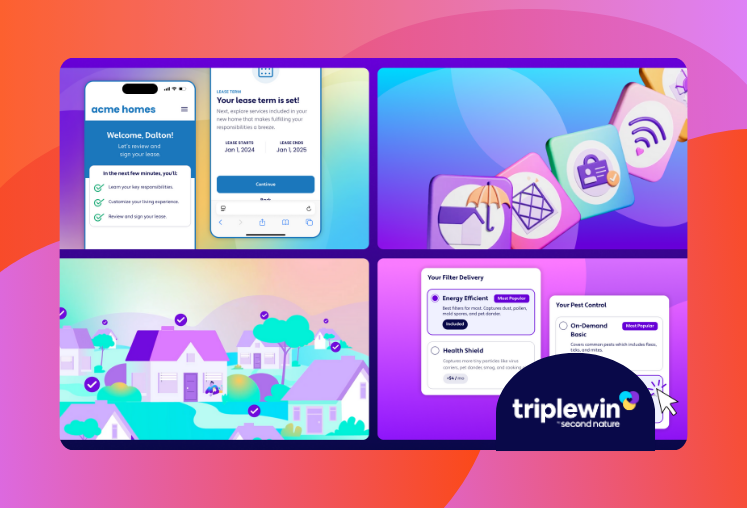
Effective rental listings attract quality applicants, minimize vacancy time, and set the tone for your residents’ experience. That’s why it’s worth taking the time to craft a compelling rental listing with attention to detail, engaging descriptions, and clear information. In today’s blog, we’ll focus on helping property managers create winning listings. Specifically, we’ll discuss: What you need before you get started What rental listings should include How to write rental listing titles, descriptions, and FAQs What to do before posting your rental listing Rental listing overview A rental listing is the first interaction many residents have with their potential new home, so it needs to entice people and welcome them in. These listings typically appear on renting platforms like Apartments.com, Zillow, and Realtor.com, showcasing essential details, images, and descriptions that help potential residents quickly identify whether a property suits their needs. A top-notch listing typically includes: A compelling headline: Highlight a unique feature like "private balcony" or "near downtown" to get the prospective resident interested. High-quality photos: Clean, well-lit pictures of both interior and exterior spaces that showcase the entire rental property. Essential details: Number of bedrooms and bathrooms, square footage, total monthly rent (including base rent and any recurring mandatory charges), pet policies, and amenities. For example, compare these headlines: "2BR Apartment in Midtown" "$1,800 per month– 2 Bed/1 Bath Apartment in Midtown with In-Unit Laundry" The second headline not only gives more details but also draws attention to a key feature. Well-written listings also set expectations by including restrictions (e.g., "no smoking" or "no pets") and highlighting proximity to schools, parks, or public transit. This saves time by weeding out residents who wouldn’t be interested and minimizes the number of questions you have to answer later. What the rental listing should include A strong rental listing provides all the information a prospective resident needs to make an informed decision. Here’s what to include: Interior details: Number of bedrooms and bathrooms, square footage, and specific features like hardwood floors or vaulted ceilings. Common spaces: Shared amenities such as a fitness center, pool, or laundry facilities. Exterior spaces: Whether the property has a yard, patio, or balcony. Restrictions, such as pets, smoking, occupancy limits, and specific leasing conditions. Neighborhood highlights: Nearby transit options, grocery stores, restaurants, schools, and anything else relevant for residents. Application process: Requirements for background and credit checks, income restrictions, and how to apply. Costs: Monthly base rent, security deposit, application fee, Resident Benefits Package fee, and other mandatory charges (e.g., pet fees or parking fees). A listing that answers common questions upfront not only attracts serious inquiries but also positions the property as professionally managed, giving prospective residents more confidence in applying. Before you write your rental listing Before you start, you’ll want to gather all the information you need to create that captivating rental listing description. (Don’t worry–you can use our checklist below to get started!) 1. Property details: Include dimensions, features, and any recent updates or renovations. 2. Photos: Take high-quality images. Ensure the space is clean and well-lit, and avoid common mistakes like leaving toilet seats up or capturing clutter. Highlight the space’s uniqueness and look to other professional listings for inspiration. James Barrett, Co-Founder of Tenant Turner, and a property management expert, said, “You don’t need to have the most expensive digital camera and the greatest lenses. With modern phones, you can get the right quality. And if you're in a market where you're getting a lot of people from out of town, virtual tours [recorded with your smartphone] can be effective." 3. Optional extras: Consider including a virtual tour or 3D models, especially for residents relocating from another city. Virtual tours can help prospective residents imagine themselves in the space and better understand how a home flows from one room to the next. If you’re interested in these elevated listing experiences, we recommend checking out Plan-O-Matic. Rental listing information checklist The checklist below will ensure that your rental property description a) is comprehensive and b) appeals to potential tenants by addressing all key aspects of the property. Address and Property Type Property address (including city and zip code) Rental type: single-family home, apartment, condo, townhome, or other Rental Property Details Number of bedrooms Number of bathrooms Total square footage (including both interior and exterior, if applicable) Appliances provided (e.g., refrigerator, stove, microwave, washer/dryer) Special features (e.g., hardwood floors, vaulted ceilings, natural light, walk-in closets, fireplaces, etc) Lease term: specify duration (e.g., month-to-month, 6 months, 1 year) Parking details (on-street, driveway, garage) Application Process Background check required? (Yes/No) Credit check required? (Yes/No) Income requirements (e.g., minimum 3x rent) Documentation required (e.g., proof of income, references, identification). Consent required for checks (include state-specific legal requirements, if applicable) Costs Total monthly rent amount (defined as base rent plus any recurring mandatory charges). Security deposit amount (include explanation if it’s first and last month’s rent, etc.) Application fee (if applicable) Additional costs (Note: Any recurring mandatory charges should be separately itemized with descriptive language explaining the purpose of each mandatory fee): Resident benefits package Parking fee Pet fee or deposit (including whether the deposit is refundable or not) Utilities: Included utilities (e.g., water, sewer, trash collection, electricity, heating, cooling) Resident’s responsibility (list any excluded utilities). Pet Policy Pets allowed? (Yes/No) Limitations (e.g., specific breeds, size/weight restrictions, number of pets) Specifics (e.g., cats only, dogs only, exotic pets excluded) Amenities Shared amenities (e.g., fitness center, pool, clubhouse, laundry room) Property-specific amenities (e.g., private patio, fenced yard, garage) Community outdoor spaces (e.g., park, basketball court, garden) On-site services (e.g., 24-hour maintenance, package lockers, online payment portal) Location Highlights Nearby public transportation options (list closest stops/stations) Proximity to key commuter roads and highways Proximity to key locations: Shopping centers Grocery stores Dining and entertainment venues Pharmacies Nearby schools (mention top-rated ones, if applicable) Parks or recreational areas in the vicinity Some property listing platforms might require an FAQ section at the bottom of the rental listing with additional information that the prospective resident can review quickly to get an overview of the rental property. Many of the details listed in this checklist will also be included in the FAQ section, so be sure to have this information on hand. FAQs reduce back-and-forth communication, streamlining the process. Writing the title for the rental listing Your headline is your hook. Make it descriptive, concise, and attention-grabbing. Use this template for inspiration: [Rent Price] – [# Beds / # Baths] [Property Type] in [Neighborhood] with [Feature]. Examples: $1,750 per month– 1 Bed/1 Bath Apartment in Uptown with Floor-to-Ceiling Windows and Stunning Views $2,200 per month– 3 Bed/2 Bath Home in Old Town with Private Garden The combination of price, features, and location provides a degree of assurance that the right audience will click through and respond to the call to action. Writing the description for the rental listing Keep your rental description short but impactful, and use vivid language to highlight the property’s best features and selling points. Avoid generic phrases. Instead, provide specifics that create a mental image of living there. Also, keep the description to about four to six sentences (maximum eight sentences). Use this formula: "Looking for [adjective, adjective] living? Discover this [# of beds]-bedroom, [# of baths]-bathroom [type of house] in [neighborhood/city], ready for move-in on [date available]. Featuring [unique feature, such as 'an open-concept kitchen,' 'a spacious backyard,' or 'stunning city views'] and [additional amenities, such as 'on-site parking' or 'in-unit laundry']. Conveniently located near [landmark, public transportation, shops, or schools]. [Accepts/Does not accept] pets. Total Rent: [rent-amount]/month (which includes base rent plus [description of recurring mandatory fees]). Security deposit: [number of months deposit] months. Utilities: [list of utilities included or specify resident responsibility]. Apply now: [application process details, such as an online link or email address], or contact [your name] at [your phone number] to schedule a viewing." Example: Bright and spacious 2-bedroom apartment in the heart of Downtown. Enjoy modern stainless-steel appliances, in-unit laundry, and stunning city views from your living room. Just steps away from cafes, public transit, and parks. Pet-friendly. Total rent is $2,000/month (which includes base rent plus [utilities, RBP, etc.]) with a $1,000 security deposit. When mentioning restrictions or requirements, be upfront. This prevents mismatched expectations, saving time for everyone involved. Pro-tip: Something worth noting is that prospective residents may be put off by properties that have been on the market for a while. It may raise questions about why it hasn’t been leased yet. For that reason, we recommend updating your listing description to simply say, “ready for move-in today” once the property is available, rather than keeping a specific listing date from the past. Including Resident Benefits Package language in the description When listing a rental property that includes a Resident Benefits Package, it’s important to be transparent about both the price of the package and what benefits are included. This can help set clear expectations upfront, and help attract potential residents who are interested in the benefits you’re offering. Here’s an example of how you can present your Resident Benefits Package in a listing: At [Company Name], we strive to provide an experience that is cost-effective and convenient. That’s why we provide a Resident Benefits Package (RBP) to address common headaches for our renters. The total monthly rent price of $[total rent price]* includes base rent plus our RBP which includes our renter’s insurance program, on-demand pest control services, air filter delivery, utility concierge, rent reporting services for credit building and more, automatically added to every property as a required program. More details upon application. *If you provide your own insurance policy, the resident benefits package cost will be reduced by the amount of the insurance premium billed by Second Nature Insurance Services (NPN No. 20224621). Before you post your rental listing It’s a best practice to conduct a final check before posting your listing: Proofread: Typos and unclear details can affect credibility, so you’ll want to make sure you review the copy and run a spelling and grammar check. Comply with Fair Housing laws: Avoid discriminatory language. Review photos: Make sure your listing photos are uploaded correctly. Review the photos to make sure there are no duplicates, the photos aren’t blurry or rotated, and that all the photos accurately represent the space. Review costs: Make sure you’ve mentioned screening costs, such as the credit and background check, as well as any other associated costs. Verify platform rules: Ensure your listing adheres to site guidelines. Once the listing is posted, track how residents find your property—whether through a listing site, social media, or referrals. This insight will help refine your strategy for future listings. Learn more: How to Screen Potential Tenants: Tips for Property Managers What is Security Deposit Insurance? Pros and Cons Pet Policy for Renters: Best Practices for Property Managers Great example of a rental listing Let’s take a look at an example of a great rental listing and what makes it stand out. Why it’s a great listing: Simple, high-quality photography showing the exterior of the unit Clear details of beds, baths, square footage, move-in date, and full address Transparent pricing including both base rent and total monthly cost Why it’s a great listing: Highly transparent, itemized cost breakdown Clear terms and conditions regarding utilities, pet fees, and insurance Highlights key features like fireplace, fenced yard, and pet friendliness Why it’s a great listing: Once again, it highlights key features, going into more detail about them Emphasizes flexibility in lease terms Summarizes the Resident Benefits Package, such as what’s included and that it’s a required program Final thoughts Creating a rental listing that stands out requires attention to detail and a focus on providing clear, engaging, and accurate information. A well-crafted listing not only attracts the right residents but also sets the tone for a positive renting experience. One often overlooked tip is to ask prospective residents how they discovered your listing. This can help you understand which platforms yield the best results, allowing you to refine your approach over time. For additional guidance and resources, check out these helpful tools: 9 Ways to Improve Your Resident Experience Property Management Rental Inspection Checklist [Free Template] To gain deeper insights into crafting rental listings that convert, watch the on-demand webinar Listing to Leased. This session explores expert tips for creating professional, appealing listings. Finally, learn how you can elevate the living experience for your residents with Second Nature’s Resident Benefits Package. It's a simple way to enhance resident satisfaction and streamline property management.
 January 16, 2025
Read more